
All memory locations in BotW: how the twelve capturable memories sit across Hyrule
Every player who wants Master Cycle Zero, or who simply wants to piece together Link’s fragmented past, eventually asks the same question: where are all memory locations in BotW, and in what order should they be restored? Breath of the Wild scatters twelve photographic memories across the entire map. The reliable way to stitch Link’s story back together is to visit each spot, trigger the cutscene, and return the photo either to Pikango in Kakariko Village or to the picture book inside Impa’s house. This walkthrough covers every capturable memory, the region it belongs to, the landmark to navigate toward, and the practical steps to clear the quest without backtracking across the entire map.
Before walking the map region by region, it helps to understand how the system was built. The Captured Memories quest is one of the more economical narrative tools in the open-world genre: a single side quest that supplies emotional stakes, a reason to traverse every biome, and a meaningful reward, without ever locking the main path. The memories also work as a working example of show-don’t-tell world design, because each picture is essentially a level-design note that says this place mattered once, and the developers want the player to walk through it again with new context.
There is also a small but useful detail about how the photos are delivered. Impa does not simply tell Link about the memories; she hands over a Sheikah Slate that already has the twelve photographs loaded into its album. From that moment on, the album is the canonical source of truth for the quest state, and every other system in the game reads from it. That is why the same memory can be referenced by Pikango, by the picture book, and by the post-quest cutscene without any of those systems drifting out of sync.
How the Captured Memories system actually works
The Captured Memories quest activates when you talk to Impa in Kakariko Village after leaving the Great Plateau. She hands you a Sheikah Slate with twelve photographs of Link’s past, and Pikango, the painter standing just outside Impa’s house, begins offering hints about the nearest unfound memory based on your current position on the map. The quest does not require the photographs to be located in any particular order, and the developers built the hint system so that Pikango always points you toward the geographically closest unfound memory. The intended path is whichever path you are already taking through Hyrule.
Mechanically, each memory is bound to a small circular detection zone near a landmark. When Link enters the zone, a brief scripted event plays, a memory is added to the picture book in Impa’s house, and Pikango updates his next hint. There is no fail state, no timer, and no inventory cost. The only soft constraint is that some memories are easier to find at specific times of day or under specific weather conditions, which the developers used to make certain scenes feel earned rather than incidental.
The hint logic is also worth a closer look. Pikango’s dialogue is a small lookup table indexed by region, and the table is filtered each time the player enters a memory so that it only returns rows whose flag is still false. The painter then picks the row with the shortest straight-line distance to the player’s current coordinates and reads the matching line. That is why his hints feel personal even though they are drawn from a fixed script. The system rewards motion, which is the entire point of the quest.
What triggers a memory to unlock
- Approaching the marked landmark within a short radius, usually less than fifty meters.
- Standing in the trigger zone long enough for the camera to take over.
- Having the corresponding Sheikah Slate photo selected, or accepting Pikango’s current hint.
None of these triggers are hidden behind a story gate, and none of them depend on shrine completion, tower activation, or main-quest progress. That choice is deliberate, because the memory quest is meant to be a parallel narrative track that the player can finish at any pace. Speedrunners in particular rely on the lack of gating to collect the cycle in well under an hour by warping directly to memory-adjacent shrines from the Great Plateau.
Why the trigger radius is forgiving
The trigger radius is intentionally larger than a single pixel. The developers chose a sphere that covers most of the practical approach to each landmark, so a player can walk, ride, or glide into the zone without having to dismount or stop on a specific tile. That choice is part of why the quest feels generous. The radius is small enough that the player has to actually visit the area, but large enough that the moment of discovery does not feel like a pixel hunt.
Region-by-region map of every memory
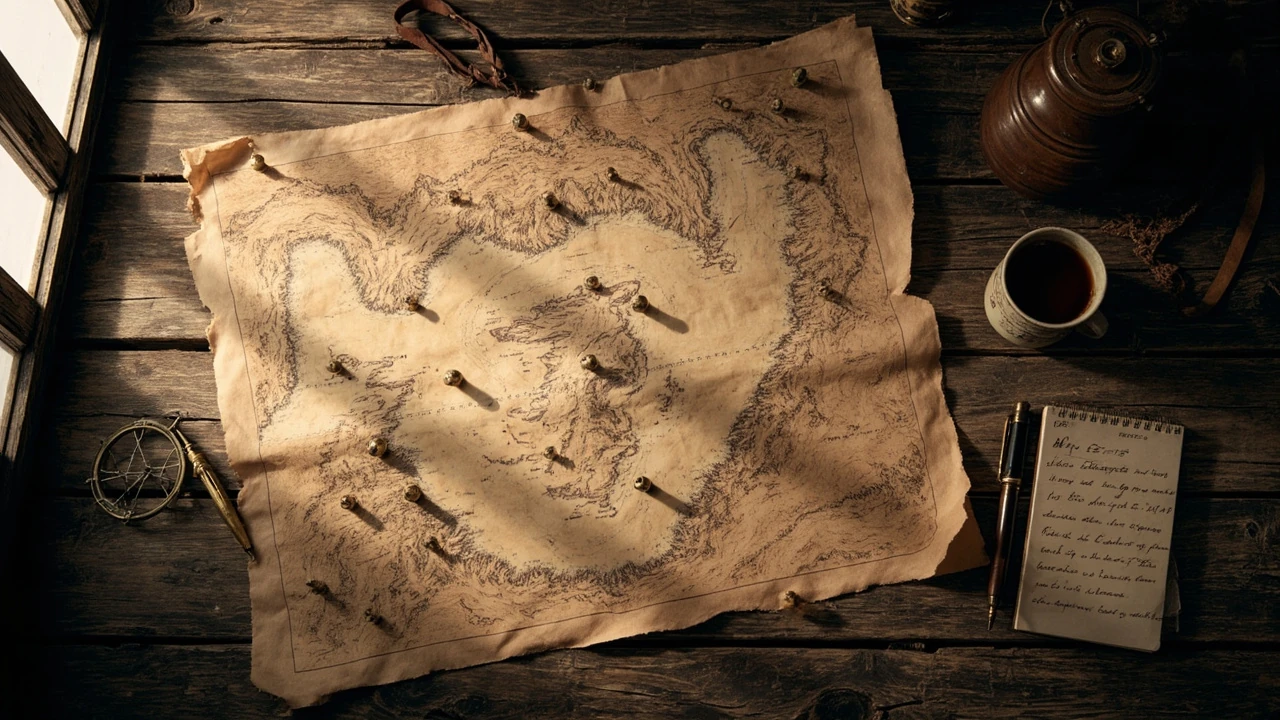
The table below summarizes all twelve memory locations, the region they belong to, the most reliable landmark to navigate toward, and the approximate coordinates measured from the in-game map. Coordinates are written in the standard Breath of the Wild grid and can be entered into the Sheikah Slate’s map screen to drop a pin directly on top of the trigger zone.
| # | Region | Landmark to use | Approx. coordinates | Notes |
|---|---|---|---|---|
| 1 | Central Hyrule | Outskirt Stable | 0685, 1540, 0230 | Closest memory to the Great Plateau; Pikango’s first hint after the Plateau. |
| 2 | Central Hyrule | Woodcutter’s House, north of Batrea Lake | 1148, 1759, 0090 | Sits on a small rise; easier to find from the road than from the lake itself. |
| 3 | Dueling Peaks | South of Fort Hateno, near the cliff edge | 0717, 2243, 0040 | Open grass, no obvious landmark; rely on the pin. |
| 4 | Hateno | Hateno Beach, east of the village | 1049, 2140, 0020 | Easy to miss because the trigger zone is at the shoreline. |
| 5 | East Necluda | Near the southern bridge over the Lanayru road | 1170, 1870, 0020 | Visible from the road; often picked up while traveling toward Tarrey Town. |
| 6 | Faron | On the path between Lake Floria and the wetland | 0915, 0908, 0030 | Requires the Zora armor or a raft to reach if the rain is heavy. |
| 7 | Ridgeland | Top of a small hill east of Tabantha Stable | 2648, 1686, 0230 | One of the few memories on a hilltop; look for a dead tree. |
| 8 | Tabantha | Near the edge of the Tabantha Great Bridge | 1976, 1070, 0180 | Often the first memory found by players heading toward Rito Village. |
| 9 | Gerudo | Just outside Gerudo Town gates | 2371, 3248, 0080 | Easy to find on the way into town. |
| 10 | Gerudo Highlands | South of the Gerudo Summit | 2008, 2771, 0230 | Cold biome; warm clothing required. |
| 11 | Hebra | Below the Hebra Trailhead Lodge on the snowfield | 1331, 2941, 0200 | Trigger zone blends into the snow; rely on the pin. |
| 12 | Akkala | South of Akkala Citadel Ruins | 3172, 2233, 0120 | Often the last memory found because Akkala is geographically far from the Plateau. |
These coordinates describe the approximate center of each memory’s trigger zone. Because the memory is triggered by proximity rather than by standing on an exact pixel, you can usually stand anywhere within a few meters of the listed point and the cutscene will begin. The in-game pin will appear on the map automatically when Pikango gives you a hint, and you can also pull up any photo from the Sheikah Slate album to re-summon the pin on demand.
It is worth pointing out that the coordinates above are written in the Breath of the Wild grid, not the Tears of the Kingdom grid. The two games share map data but the coordinate offsets are not identical, and a coordinate that lines up perfectly in one game can land several meters off in the other. If you are cross-referencing this walkthrough with a Tears of the Kingdom guide, treat the numbers as approximate rather than exact, and always confirm against the in-game pin before you commit to a glide path.
For a quick at-a-glance summary of how the regions stack up in travel distance from the Plateau, the second table below ranks them by roughly how far a typical first-sweep player will need to detour to reach each memory from a nearby shrine.
| Region | Approx. detour from nearest shrine | Travel loadout suggestion | First-sweep order |
|---|---|---|---|
| Central Hyrule | Short glide from the Outskirt Stable shrine | No special gear | 1-2 |
| Dueling Peaks | Short walk from the Dueling Peaks stable | No special gear | 3 |
| Hateno | Short walk from Hateno Village | No special gear | 4 |
| East Necluda | Short walk from the Lanayru road tower | No special gear | 5 |
| Faron | Steep climb from Lake Floria | Zora armor, optional stamina food | 6 |
| Ridgeland | Short ride from Tabantha stable | No special gear | 7 |
| Tabantha | Short walk from Tabantha Great Bridge | No special gear | 8 |
| Gerudo | Short walk from Gerudo Town gate | Heat-resistance food or desert gear | 9 |
| Gerudo Highlands | Long climb from the Gerudo Summit shrine | Cold-resistance food or Snowquill set | 10 |
| Hebra | Long glide from Hebra Trailhead Lodge | Snowquill set, warm meal | 11 |
| Akkala | Long glide from Akkala Ancient Tech Lab | No special gear | 12 |
That ordering matches the clockwise loop the developers seem to have used when they placed the triggers, and it keeps Pikango’s hint logic one step ahead of you for the entire run. If you follow it from the Plateau, the painter will essentially narrate the trip in order without ever sending you backward on the map.
Restoration order and what changes after you return the photos
Return order is purely a player choice. You can hand all twelve pictures to Pikango one by one, or you can deposit them in the picture book inside Impa’s house. Both methods count toward the quest, and both reward you the same way: a final cutscene plays once the twelfth memory is added, and Master Cycle Zero becomes available as a reward from the EX Strange Man who appears in the backyard of the Akkala Ancient Tech Lab.
What the developers unlock at each threshold
- One memory returned: the quest updates and Pikango offers the next hint.
- All twelve returned: a unique cutscene plays in Impa’s house.
- After the cutscene: a portal appears in the Akkala Ancient Tech Lab yard.
- After meeting the EX Strange Man: Master Cycle Zero can be summoned from the key item menu.
There is no progression gating based on shrine count, divine beast count, or main-quest progress. The only thing that gates Master Cycle Zero is the act of having all twelve memories inside the book, which is why speedrunners can collect the cycle in under an hour by rushing memory locations directly from the Plateau.
The quest’s reward design is also a useful case study in restraint. Most open-world side quests pad the reward with a small bonus at each step so the player feels progress. Captured Memories does the opposite: the only meaningful payoff is the cycle, and it only arrives once. A single, well-timed reward lands harder than a stream of small ones, and it avoids the inflation problem that drags down the late game in many open-world titles.
Memory-by-memory detail for hard-to-find spots
The map above gives you the macro view, but several memories are notorious for being skipped on a first pass. The list below covers the spots that consistently cause missed triggers and explains the visual cue the developers placed for each one.
Central Hyrule and the early-game trio
- Outskirt Stable area. The trigger is on the road between the stable and the canyon. Look for a small cluster of trees and a rocky outcrop; the cutscene plays when you walk between them.
- Woodcutter’s House. The exact spot is on the rise directly north of the house, not at the house itself. The pin sits about fifty meters past the chimney.
- Fort Hateno overlook. This memory is on the cliff edge with a clear view of Hateno Village. It is one of the easier ones to confirm visually because the photo shows the village below.
East Necluda and Faron
- Hateno Beach. The trigger is on the sand close to the waterline. Players who approach from the village road often miss it because they stay too far inland.
- South Lanayru bridge. The pin is offset from the bridge, on the grass to the east. Walk ten meters off the road and the cutscene will start.
- Lake Floria approach. The Faron memory is the only one that strongly recommends a specific loadout: the Zora armor makes the climb trivial, and the trigger sits at the top of a small rise above the lake.
Tabantha, Hebra, and the cold regions
- Tabantha Great Bridge edge. Stand at the foot of the bridge on the south side and face north; the cutscene plays within seconds.
- Tabantha hilltop. The dead tree is the anchor. The trigger zone is the small clearing just past the tree, not under it.
- Hebra snowfield. Snow biome lighting flattens the visual cues. The pin is the only reliable way to find this one, and warm clothing is required before the cutscene will play.
Gerudo and Akkala
- Gerudo Town gate. The trigger is just outside the walls, on the left side of the road as you approach from the main bridge.
- Gerudo Summit approach. This memory is on a snowy shelf below the peak. The path is a short detour from the road that climbs toward the summit shrine.
- Akkala Citadel. The final memory is on a grassy rise south of the citadel. The pin is the most useful cue because the rise blends with the surrounding hills.
One more note on the Hebra memory specifically. The trigger zone is on open snow with no obvious landmark, and the photo in the slate album shows a featureless slope. The developers placed the memory here on purpose, because Hebra is the region most likely to feel empty on a first visit, and the photo forces the player to slow down and read the terrain. It is the most level-design-heavy of the twelve memories, and the one that teaches the player that the slate’s pin is a more reliable tool than the photo itself.
Common edge cases players hit
Even with the full table above, several situations reliably confuse first-time players. They are worth documenting because they reveal how the developers chose to handle state, weather, and main-quest interference.
Weather and time-of-day sensitivity
Most memories do not care about time of day or weather, but a few are noticeably easier to confirm under specific conditions. The Hebra and Gerudo Highlands memories are easier to spot in daylight because the cutscene fades in from the snow. The Faron memory is much harder to reach during a thunderstorm, because the rain mechanic prevents climbing and the only safe approach is along the road through Lake Floria. None of these memories are technically locked by weather, but the developers clearly tuned the surrounding traversal to assume good conditions.
Time of day is a softer variable. None of the memories will refuse to trigger at night, but several of the cutscenes are framed around lighting that reads better in daylight, and Pikango’s hint dialogue is written as if the player is traveling during the day. If you are doing a clean sweep, plan the cold and the shadow-heavy regions for the morning hours and save the open grass memories for the late afternoon. The cutscenes will fire either way, but the framing lands more cleanly when the lighting matches the photo.
Trigger radius confusion
The most common cause of “I stood on the pin and nothing happened” reports is that the player has the wrong Sheikah Slate photo selected. The memory trigger checks for the photo currently active in the slate’s album, and if the player is looking at a different picture the cutscene will not play. The fix is to open the album, select the photo that matches the region you are in, and then re-enter the trigger zone. Once you do this once, the game’s state machine updates and subsequent memories will trigger normally even if you leave the slate on a different image.
Quest state resets
Talking to Pikango after finding a memory will update his hint to the next closest location. If you do not talk to him, the hint stays on the last memory you found, which can make you feel like the quest has stalled. A second conversation with Pikango almost always refreshes the hint state, and the developers intentionally left this small delay in to avoid spoiling the next location while you are still on screen.
Main-quest interference
There is a subtle interaction with the main quest that trips up first-time players. If you have already triggered the Lost Memories sequence in the main story, certain memories will play their cutscenes with the main-quest framing instead of the side-quest framing. The underlying state is the same, the photo is still added to the book, and the reward is still the cycle, but the dialogue is different. This is not a bug. It is one of the few places in the game where the main quest and a side quest share content, and the developers reused the same cutscene data rather than authoring two separate versions.
For developers reading this as a case study, the clean stopping point is the most underrated part of the design. Many open-world games extend side quests past the point where the original emotional beat has landed. Breath of the Wild avoids that trap by capping the quest at a single reward and a single cutscene, then returning the player to free roam. The design is worth remembering whenever a side quest starts to grow past its narrative purpose: a clean ending is itself a design decision, and it is one of the reasons the Captured Memories quest has remained a reference point in the genre. For a closer look at how reward pacing is handled across the Zelda franchise and how the series treats its long-running world design conventions, the franchise overview on Wikipedia is a useful reference for historical context.
Designer notes: what the Captured Memories system teaches about open-world pacing
From a level-design perspective, the Captured Memories quest is a working example of how to embed narrative into traversal without breaking flow. The designers distributed twelve fixed points across the entire map, then tied the player’s discovery order to whichever path they were already taking. The hint system uses the player’s current position as a search index, which means the quest always feels reactive rather than prescriptive. That same pattern shows up in interactive map design for open-world titles and in region-based fast-travel logic across the genre, where the system always points the player at the closest meaningful beat rather than at a fixed list.
The quest also demonstrates a clean separation between content density and story density. Each memory is a few seconds of content, but the act of walking there supplies minutes of traversal, and the resulting cutscene lands with more weight because the player has earned the context. That is why so many studios studying open-world pacing cite Breath of the Wild as a reference. The same separation is useful in a production pipeline because it lets writers and level designers work on different tracks without blocking each other. A level designer can place a memory trigger in a biome, and a writer can drop the cutscene in independently; the quest state machine stitches the two together at runtime.
For developers who want to replicate the pattern, three implementation notes are worth taking away:
- Tie the hint logic to the player’s current position rather than to a fixed list. The quest will feel responsive even if the player skips the intended path.
- Keep the trigger radius forgiving. A few meters of slack makes the system feel generous without making it feel trivial.
- Store the memory-found flag per slot, not as a single counter. This allows the quest to track partial completion across save games and across difficulty modes.
It is also worth flagging one limitation of the pattern. A purely position-based hint system stops scaling once a quest has more than roughly twenty triggers, because the closest-neighbor logic starts to feel mechanical and the player begins to recognize the same hint structure across regions. Breath of the Wild gets away with twelve because the photo book gives the player a secondary lookup that breaks the pattern, and because the cutscenes themselves are strong enough to carry the variety. If you scale the same design up, plan to vary the hint logic so the player does not feel like they are solving the same puzzle in every biome.
Strategy recommendations for a clean first sweep
If you want to clear all memory locations in a single sweep rather than stumbling on them across multiple playthroughs, the most efficient route starts at the Great Plateau, drops south to the Outskirt Stable, then loops clockwise: Central Hyrule, Hateno, East Necluda, Faron, Tabantha, Hebra, Gerudo, Gerudo Highlands, and finally Akkala. The loop follows the same counterclockwise path that the developers used to seed the quest’s hint logic, which means Pikango’s hints stay roughly one step ahead of you for the entire run.
A few practical tips from experienced players:
- Drop a custom pin the moment Pikango names a region, then teleport to the nearest shrine and glide in. The memory will usually trigger before you touch the ground.
- For the snow biome memories, swap to the Snowquill set before entering the region. The cutscene is uninterruptible, but the cold meter will drain during the photo’s slow zoom and you do not want to lose the memory to a stray hit.
- For the Faron memory, approach from the south road rather than from the lake. The road path avoids the rain-climbing problem entirely and lets you walk straight into the trigger zone.
None of these tricks are required, and the quest is balanced to be completable with no preparation at all, but they do cut a clean sweep down to roughly an hour of focused travel. That pacing is the part most worth studying, because it shows how a small number of well-placed triggers can carry a surprisingly large amount of narrative and traversal weight.
One more piece of sweep planning is worth mentioning. The Akkala memory is the one most often left for last, because Akkala sits on the far edge of the map and most players only travel there after finishing the surrounding regions. If you are doing a clean sweep and want the final cutscene to play in a specific order, save Akkala for last so the Master Cycle Zero portal appears in the same session as the rest of the quest reward. The game does not enforce this, but it is the order that produces the cleanest narrative arc.
What to do after you have all twelve
Once the twelfth memory is returned, the game’s state machine fires a final cutscene inside Impa’s house, and Master Cycle Zero becomes summonable from the key item menu. The cycle is functionally a faster horse that ignores most terrain, and it is the only motorcycle in the game, which is why the reward feels like a thank-you for finishing the quest. There is no additional post-quest content tied to the memories, and the developers deliberately stopped at the cycle to avoid padding the quest with extra steps.
The cycle itself has a small set of practical quirks worth knowing. It has its own durability meter and will break if it takes enough damage, after which it can be re-summoned at any shrine or stable for a small ore cost. It is faster than the best horse on flat ground, slower than a well-stoked Sand Seal in the desert, and roughly equivalent to a fully upgraded glider for long cross-country trips. The developers tuned it as a traversal tool rather than as a combat tool, which is why it has no weapon and no armor slots.
For developers, the post-quest state is also worth a closer look. The moment the twelfth memory is added, three independent systems fire in sequence: the picture book plays its closing cutscene, the Akkala Ancient Tech Lab yard spawns the EX Strange Man portal, and the key item menu unlocks the cycle entry. None of those systems wait on each other, and all three are driven by the same single flag. That is why a player can warp straight from Impa’s house to the tech lab and find the portal already active. The flag is global, the systems are local, and the player experiences the result as a single smooth moment even though three separate pipelines are firing under the hood.
There is also a small saving tip that comes up often in community guides. The Master Cycle Zero key item is not consumed on summon, so the cycle can be called, ridden, dismissed, and recalled indefinitely. The only cost is the ore paid at the re-summon prompt, and even that is waived the first time the cycle is called from the tech lab yard. If you are planning a long trip across multiple regions, the cycle is one of the most ore-efficient traversal options in the late game, and it pairs well with the Tabantha bridge memory as a starting point for cross-country travel.
Frequently asked questions
How many memory locations are there in BotW?
There are exactly twelve capturable memory locations in Breath of the Wild, and finding all of them is required to unlock Master Cycle Zero. The quest tracks each memory as its own slot, so partial completion is always visible on the picture book inside Impa’s house in Kakariko Village.
Do I have to find the memories in order?
No. The quest is designed so that memories can be found in any order. Pikango’s hint system always points to the geographically closest unfound memory, which means the intended path is simply the path you are already walking. Players who skip the Plateau and head straight for Akkala will get a different hint sequence, and the quest will still complete normally.
Why does the memory cutscene not trigger when I stand on the pin?
The most common cause is that the Sheikah Slate has the wrong photo selected. The trigger only checks for the currently active photo, so opening the album and selecting the picture that matches the region you are in will almost always fix the problem. If that does not work, walk ten meters away and re-enter the trigger zone, because the game’s state machine updates on entry rather than on continuous overlap.
Can I find memories during a thunderstorm or at night?
Yes. None of the memories are locked behind weather or time of day. Some memories, particularly the ones in Hebra and the Gerudo Highlands, are visually easier to confirm in daylight, and the Faron memory is much faster to reach when it is not raining, but the cutscenes will trigger regardless of conditions.
Where do I return the memories once I find them?
You can either talk to Pikango just outside Impa’s house, or you can walk into Impa’s house and place the photos in the picture book on the second floor. Both methods count toward the quest, and both update Pikango’s hint. The picture book is the more visible record of progress because every photo you have found stays in the book even after Pikango takes the slate back.
What is the reward for finding all twelve memory locations?
The reward is a final cutscene inside Impa’s house, followed by the ability to summon Master Cycle Zero, a motorcycle that can be called from the key item menu and that ignores most rough terrain. The cycle is the only vehicle of its kind in the game, and it is a useful traversal tool for late-game exploration.
Do memory locations respawn or change after the quest is complete?
No. The memory triggers are one-time events, and once a memory is added to the picture book the trigger zone has no further effect. The Master Cycle Zero reward is permanent and can be summoned at any shrine or stable, which means the quest’s only lasting gameplay effect is the cycle itself.
Are the memory locations the same on every save file?
Yes. All twelve memory locations are baked into the game’s world data and are identical on every save. The developers chose fixed placement to make the quest predictable for guides and to keep the picture book feeling like a stable reference rather than a procedurally generated diary.
Can I find memory locations before finishing the Great Plateau?
No. The quest does not activate until you leave the Great Plateau and speak with Impa in Kakariko Village, and Pikango will not give hints until that conversation is complete. The Sheikah Slate also does not contain the twelve photographs until Impa hands them over, which means there is no way to trigger a memory before the quest formally starts.
Is the Captured Memories quest worth doing on a first playthrough?
For most players, yes. The quest is one of the stronger narrative tracks in the game, and the cycle reward is a meaningful upgrade to late-game traversal. The quest also routes you through every major biome, which makes it a useful introduction to the map’s structure if you have not yet activated every tower.




Leave a Reply