
Solved by the Bell quest in Hogwarts Legacy: what you need to know first
The Solved by the Bell side quest in Hogwarts Legacy starts with a small piece of parchment that most players walk past on their first run through the southeastern tip of the Manor Cape region. The quest is optional, but it folds two unrelated systems together: a short environmental puzzle that uses standard school spells, and a small easter egg that ties back to the broader Harry Potter film franchise. If you are already clearing the area for the Infamous Foe fight, the quest fits naturally into the route and adds a useful reward on top of the combat loot.
This guide walks through the prerequisites, the exact path to Henrietta’s Hideaway, the two puzzle steps inside the hideaway, and the bell chamber that gives the quest its name. The focus is on what to do, what to bring, and what to expect so you do not waste a long detour on a missing spell or a misread map. Because the quest mixes light story beats, environmental puzzle design, and a small reward loop, it is a good example of how Avalanche Software layered optional content on top of the open-world structure of Hogwarts Legacy.
One small clarification before the steps: the quest is part of the side content that scales with your year and chapter progression. You do not need to finish the main story to start it, but you do need basic combat spells, the Alohomora charm progression, and a few exploration spells that the game gives you in the first few main missions.
Quest prerequisites and recommended level
Solved by the Bell is not gated by a strict level requirement, but the surrounding area is. Henrietta’s Hideaway sits under a ruin that is patrolled by Ashwinders, including the Infamous Foe boss called Dunstan Trinity, so you should plan for a real fight before you enter the puzzle. If you are under-levelled, the puzzle will still work, but the surrounding enemies will feel much harder than the quest itself.
- Spells you actually need: Confringo or Incendio (fire), Glacius (ice), and Wingardium Leviosa (levitation). All three are unlocked through the main story well before you reach this area.
- Recommended level range: around level 17 to 22 for a comfortable fight against Dunstan Trinity and the Ashwinder patrol, which keeps the quest in line with the recommended level printed on the official IGN page for the quest.
- Inventory space: leave at least three to four open slots. The hideaway has a few chests and the quest reward is a small gear piece, so a full bag forces a trip back to Hogsmeade mid-quest.
- Alohomora: not strictly required to enter the hideaway, but useful if the surrounding ruin has any locked doors you want to clear on the way in.
If you have already cleared the Infamous Foe on the Manor Cape peninsula, the quest becomes much simpler. You can skip the combat buildup, drop straight to the entrance of Henrietta’s Hideaway, and focus on the two puzzle rooms. If you have not, treat the ruin above the hideaway as a small combat encounter with a side objective and approach it as you would any other open-world outpost.
How to reach Henrietta’s Hideaway
Henrietta’s Hideaway sits on the southeastern tip of the Manor Cape peninsula, which is the coastal stretch of land south of Hogwarts castle. The fastest approach is to fast travel to the closest Floo Flame on the southern coast, then ride or walk southeast along the cliff path until the ground starts to drop into a set of stone steps.
The visual landmark you are looking for is a ruin with a reaper statue motif. The two reaper statues on either side of the entrance are part of the puzzle, so if you see them, you are close. The path leading southeast from the ruin eventually turns left and runs down a short staircase. The entrance to Henrietta’s Hideaway is at the bottom of those steps, partially hidden in the cliff face.
A useful route planning habit for this area is to clear the ruin first, then approach the hideaway. The Ashwinders above the entrance will aggro onto you as you approach, and if you try to ignore them, the Infamous Foe can follow you down the steps and interrupt the puzzle. Pulling the fight away from the entrance, finishing the boss, and then walking down on your own terms keeps the puzzle clean and stops a long stunlock from cutting your bell sequence short.
One more thing worth knowing before you head out: Henrietta’s Hideaway is a named location on the world map, but it only appears as a discoverable icon once you get close. Until then, the closest map marker is the Floo Flame on the southern coast. Plan your route from that Floo Flame rather than from the castle, and you will save a long ride on the broom.
First puzzle room: lighting the braziers and placing the block
As soon as you step inside Henrietta’s Hideaway, the room presents two puzzles back to back. The first is a small environmental test that combines three of your standard school spells. It is short, but the order matters, and the room does not give you a checkpoint between steps, so it pays to read the room before casting.
- Turn left toward the first reaper statue. Use Confringo or Incendio to light the brazier in front of it. Either fire spell works because the game only checks the damage type, not the specific cast.
- Once the brazier is lit, the reaper statue will turn and reveal a block sitting in a small alcove behind it.
- Cast Wingardium Leviosa on the block, lift it across the room, and place it on the corresponding pedestal in front of the closed door.
- Now look at the two side blocks. The block on the left needs a fire spell, the block on the right needs Glacius. Cast Confringo or Incendio on the left block and Glacius on the right block to open the door.
The order of the last two casts does not matter. The game checks the final state of each block rather than the order in which you cast. If the door does not open, it almost always means one of the side blocks is the wrong damage type, so walk back and recheck before you assume the puzzle is broken.
There is also a small trick that makes the first room faster on repeat runs. If you already know the layout, you can cast Wingardium Leviosa on the central block first and hold the cast while you light the left brazier with a quick Confringo. The block will follow your camera as you turn, so you can place it on the pedestal in a single motion. It is not required, but it does shave a few seconds off the room on a second or third run.
Second puzzle room: the bell chamber and the Magical Map
Past the first door, the hideaway opens into a slightly larger chamber. This is the room that gives the quest its name. Before you interact with anything here, light the second brazier in front of the reaper statue on the right. This lights up the room and reveals the bell puzzle that the Magical Map is pointing to.
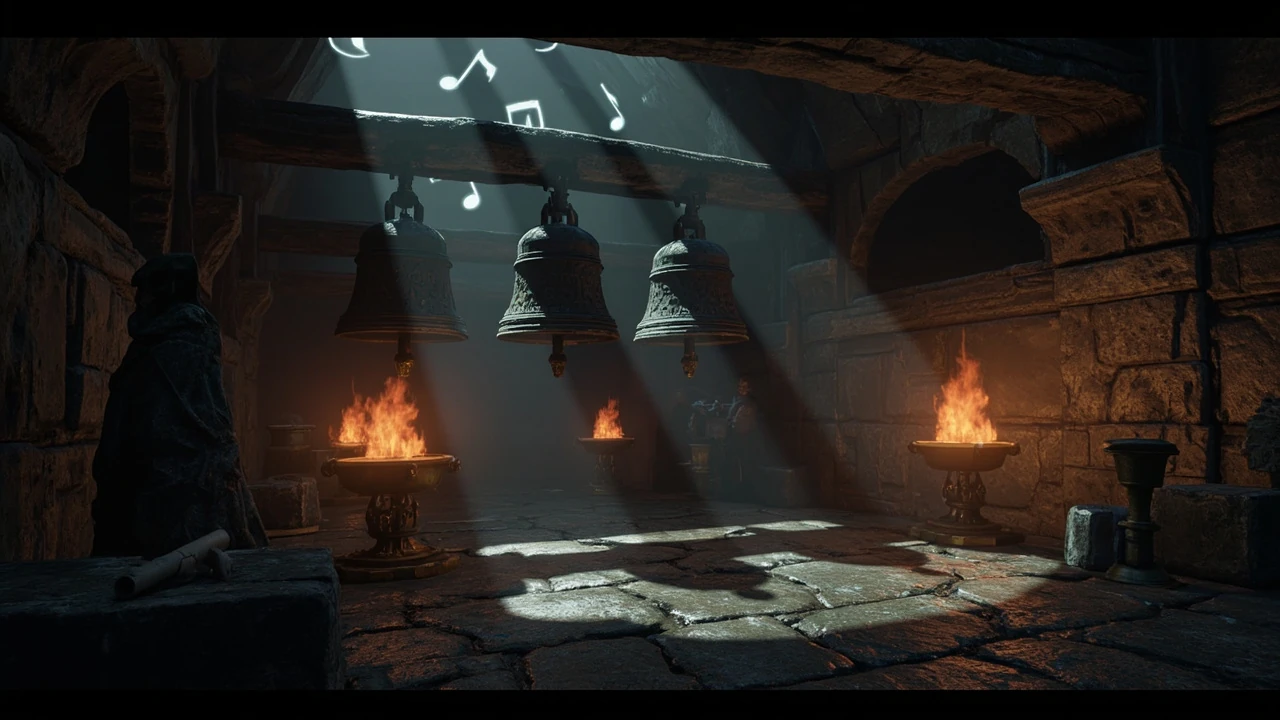
The Magical Map, which you pick up on the way in, shows a small drawing of three bells and a line of musical notes. The map is a stylized hint rather than a literal diagram: it tells you that you will be ringing bells in a specific sequence, and that the sequence is music-driven rather than a fixed pattern. The bell chamber has three large bells hanging from a wooden frame, each with a different tone.
To solve the bell puzzle, ring the bells in the order that matches the musical phrase on the map. The exact phrase depends on the version of the quest, so treat the map as the source of truth rather than a written guide. Once you ring the correct sequence, a small reward chest opens at the base of the frame, and the easter egg sequence triggers in the same room.
Two practical notes from the puzzle room. First, the bells are not consumed when you ring them, so if you get the order wrong, you can simply ring them again without spending any resources. Second, the easter egg is a short scripted moment rather than a full cutscene, so it is easy to miss if you turn away from the bell frame the moment the chest unlocks. Stand near the frame for a few seconds and look at the bells rather than the chest, and you will catch the reference.
Quest rewards and what to do with the Magical Map
The reward for completing Solved by the Bell is modest but useful for players who are still building out their gear in the mid-game range. The chest at the base of the bell frame gives a piece of gear with a rarity tier that scales with your current progression, which is the same loot model Hogwarts Legacy uses for most side quest chests in this region.
| Reward | Type | Notes |
|---|---|---|
| Random gear piece | Equipment (Helm, Cloak, Gloves, or Boots) | Rarity scales with player level and chapter progression |
| Experience | Character XP | Modest amount, in line with other side quests in Manor Cape |
| Easter egg cinematic | Story-adjacent moment | Reference to a scene from the Harry Potter film franchise |
| Magical Map completion | Collectible flag | Tracks the side quest as complete in the quest log |
The Magical Map itself is a quest item, not a permanent collectible. It is consumed by the quest once you finish the bell puzzle, so do not expect it to appear in your Field Guide pages. If you want a permanent record of the quest, the Journal entry for Solved by the Bell is the place to look. The gear drop is also a good reason to clear the quest on a character that is still in the level 18 to 22 band: at that point the rarity tier is usually Rare, which is a meaningful upgrade over the Common drops you find in early side content.
Common mistakes and how to avoid them
Most failed runs of Solved by the Bell come from a small set of recurring mistakes. The puzzle itself is forgiving, but the area around it is not, and the game does not always communicate which step you are stuck on. Working through the failure modes below saves a lot of backtracking.
- Fighting the Infamous Foe on the steps. Dunstan Trinity can follow you down the steps into the puzzle room and break the bell sequence. Pull the boss back to the flat ground above the entrance before you go down.
- Skipping the second brazier. The bell room stays dark and the bells are hard to read until the right reaper statue brazier is lit. If the room looks under-lit, the brazier is the first thing to check.
- Using the wrong spell on the side blocks. Fire on the left, ice on the right. Swapping them closes the door and forces a restart of the puzzle.
- Walking away from the bell frame too early. The easter egg is short and triggers in the same room as the unlock. Standing near the frame until the scripted moment finishes makes sure you actually see the reference.
- Forgetting to free up inventory space. The chest at the end of the quest cannot store overflow, so a full bag means a fast travel to Hogsmeade in the middle of the run.
Two of these mistakes are worth flagging again because they show up more often than the others. The first is the spell swap on the side blocks. The game gives you a short window to react, and it is easy to hit the same spell twice in a row when the room layout is mirrored. The second is the bell frame timing. The scripted moment at the end of the quest is roughly five seconds long, and if you open the chest and immediately head for the entrance, you will miss the visual cue and assume the quest is broken. It is not: you just walked out before the trigger finished.
How Solved by the Bell fits into Hogwarts Legacy quest design
Side quests in Hogwarts Legacy are often written off as fetch content, but Solved by the Bell is a useful case study because it shows how Avalanche Software used the same engine systems to support a small, self-contained narrative. The quest is built from three reusable parts: an exploration node on the world map, a spell-driven environmental puzzle, and a reward chest with a scripted moment. Once you see that structure, a lot of the other optional content in the game starts to make more sense.
From a game development perspective, the interesting part is how the quest blends three different game systems. The first puzzle room uses the standard spell-casting system, the bell room uses a lightweight scripted sequence, and the easter egg uses the cinematic system that the main story also uses. By keeping each step small and self-contained, the developers could place similar quests in many regions without having to build new mechanics for each one. That reuse is also why the quest feels short: it is designed to be a small reward layer on top of the exploration loop rather than a major story beat.
| System | Used in Solved by the Bell | Why it matters |
|---|---|---|
| Spell casting | Fire, ice, and levitation puzzles in the first room | Reuses the core combat spell set so the player is never blocked by a missing ability |
| Scripted sequence | Bell chamber reveal and easter egg | Allows a short narrative moment without a full cutscene pipeline |
| Loot system | Reward chest at the end of the bell room | Drops gear at the player’s current progression tier, keeping the reward useful at any level |
| World map node | Henrietta’s Hideaway icon on the Manor Cape map | Lets players find the quest through exploration rather than a forced quest marker |
For developers and technical learners, the quest is a good example of how a small amount of cross-system scripting can make optional content feel meaningful. The bells are not a new mechanic, the easter egg is not a new cinematic system, and the loot is not a new drop table, but the way the three are sequenced gives the quest a clear arc. That kind of layering is a useful pattern when you are building a content-heavy open world on a fixed timeline.
It is also worth noting that the quest is a useful stress test for first-party QA. Because it pulls from combat, exploration, and loot in a single run, it tends to expose any regression in those systems faster than a single-system quest would. If you are testing a build and want a quick check that spell casting, scripted triggers, and loot drops are all wired up correctly, Solved by the Bell is a good five-minute smoke test.
Where Solved by the Bell sits in the Manor Cape quest list
Manor Cape is one of the denser optional regions in Hogwarts Legacy, so it helps to know how Solved by the Bell fits next to the other side quests in the same area. The table below is a planning aid, not a quest order. The game does not force a sequence, but a few quests feed into each other, and clearing the Infamous Foe on the peninsula first is usually the most efficient route.
| Quest | Type | Suggested order | Notes |
|---|---|---|---|
| Infamous Foe: Dunstan Trinity | Combat | First | Clears the Ashwinder patrol around Henrietta’s Hideaway |
| Solved by the Bell | Puzzle and exploration | Second | Best run after the Infamous Foe is cleared so the boss does not interrupt the puzzle |
| Manor Cape Merlin Trial | Platforming puzzle | Any time | Independent of the Solved by the Bell quest but uses the same Floo Flame |
| Collectible runs in the ruins | Exploration | Optional | Worth doing while the area is clear of Ashwinders |
Following that rough order keeps your route efficient. You start with a combat encounter, drop into a puzzle, and finish the area with collectibles that are easier to clear once the main threats are gone. If you are mapping the region for a completionist run, treat Solved by the Bell as a checkpoint that the rest of the area can be planned around. It also gives you a natural save point: the bell chamber is a quiet room with no enemies, so it is a good place to check your map, sort your inventory, and plan the next leg of the route before you head back out to the cliffs.
Accessibility and difficulty notes
Solved by the Bell does not have a dedicated difficulty setting, but a few design choices make it more accessible than the surrounding combat content. The puzzle room has no enemies, the spell checks use the same three spells the main story teaches, and the bell sequence can be retried without a resource cost. If you are playing on a higher combat difficulty, the quest is also a good place to take a break from fighting without leaving the region.
For players with motion sensitivity, the scripted easter egg at the end of the quest is short and does not include rapid camera movement. The bell chamber itself is a small, enclosed space, so the framing stays stable while you solve the puzzle. If you are playing with the game’s accessibility settings, none of the steps in this quest override the global difficulty or aim assist settings, so your existing setup carries through.
One more accessibility note worth flagging: the bell tones are pitched, and the sequence is meant to be read as a melody. If you have trouble distinguishing pitch, the visual cue on the Magical Map is the safer signal. Each bell has a small engraved mark that matches the note on the map, and the room is lit well enough after the second brazier is lit that the marks are easy to read at a normal screen distance.
Verifying your completion
After you finish the quest, there are three small checks you can run to make sure everything registered correctly. These are useful if you are running a completionist playthrough and need to know whether a step was quietly missed.
- Open the Journal and confirm that Solved by the Bell is marked as complete. If it is still active, the bell sequence did not register and you can return to the chamber and try again.
- Check the quest reward in your gear screen. A new item should appear in the slot that matches the chest drop, with a rarity tier in line with your current level.
- Re-enter the bell chamber. The puzzle should be in a solved state, and the bell frame should still hold the same bells. The quest does not despawn the chamber, so a reset room usually means a step was missed.
For a more detailed reference of the exact quest flow, the official Solved by the Bell page on the Hogwarts Legacy wiki at IGN documents the same quest structure and the reward layout, which is useful if you want a second source before you start the run. The walkthrough on that page matches the steps above, including the spell order in the first puzzle room and the bell sequence trigger in the second.
Quick reference: the quest in one screen
If you just want a fast reminder of the quest before you start, the summary below covers the main steps, the spells, and the reward. It is intentionally short so you can skim it on the way to the Floo Flame.
| Step | Action | Spells or items |
|---|---|---|
| Reach Henrietta’s Hideaway | Fast travel to Manor Cape Floo Flame, ride southeast | Broom optional |
| Clear the ruin above the hideaway | Defeat the Ashwinders and Dunstan Trinity | Standard combat loadout |
| First puzzle room | Light left brazier, place block, cast fire and ice on side blocks | Confringo or Incendio, Glacius, Wingardium Leviosa |
| Second puzzle room | Light right brazier, ring bells in the order shown on the Magical Map | No spell required |
| Claim reward | Open the chest at the base of the bell frame, watch the scripted easter egg | Free inventory slots |
That is the entire quest. Once the chest opens and the easter egg plays, the quest is complete and you can return to the rest of the Manor Cape route. If you are doing a full clear of the region, the bell chamber is a good place to pause, open the map, and pick the next objective before you leave the hideaway. The route back up the steps is short, and the ruin above is already clear, so the rest of the area is yours to plan at your own pace.
Frequently asked questions
Where do I start the Solved by the Bell quest?
You start the quest by finding the Magical Map inside Henrietta’s Hideaway on the southeastern tip of the Manor Cape peninsula. The map appears on a surface in the first puzzle room, and picking it up adds the quest to your Journal.
Do I need a specific level to begin the quest?
The quest does not have a hard level gate, but the surrounding ruin is patrolled by Ashwinders and the Infamous Foe Dunstan Trinity. A level in the high teens is comfortable for the fight and keeps the quest in line with the rest of Manor Cape’s optional content.
Which spells are required for the first puzzle room?
You need Confringo or Incendio to light the brazier and the left side block, Glacius to freeze the right side block, and Wingardium Leviosa to lift the central block onto its pedestal. All three are unlocked through the main story before you reach this area.
Can I solve the bell puzzle without the Magical Map?
The map is the source of the bell sequence, and the puzzle is designed to be read from that map. If you lose the map before the bell room, the sequence is still visible on the table in the first room, so you can read it again before you move on.
What happens if I ring the bells in the wrong order?
Nothing is consumed and no resources are lost. The bells reset to their idle state, and you can ring them again in a new order until the puzzle unlocks.
Is the easter egg at the end of the quest important?
The easter egg is a short scripted reference to a moment from the Harry Potter film franchise. It does not unlock a new ability or reward, but it is a fun callback that is easy to miss if you walk out of the chamber the moment the chest opens.
Can I do Solved by the Bell after finishing the main story?
Yes. The quest is part of the open-world optional content, so it stays available after the main story. The reward scales with your level at the time you open the chest, so doing it later tends to give a higher rarity gear drop.
Does the quest count toward any in-game achievement or trophy?
Completing Solved by the Bell contributes to general side quest completion progress in Hogwarts Legacy, but it does not unlock a dedicated trophy on its own. It is a useful step toward the broader completion percentages that the game tracks in the menu.
What should I do if the bell frame does not react?
If the bell frame stays idle after you ring the bells, the most common cause is a missed spell on the side blocks in the first room. Walk back through the first door, recheck the left and right blocks, and recast the matching damage type on each one before you try the bell sequence again.





Leave a Reply