

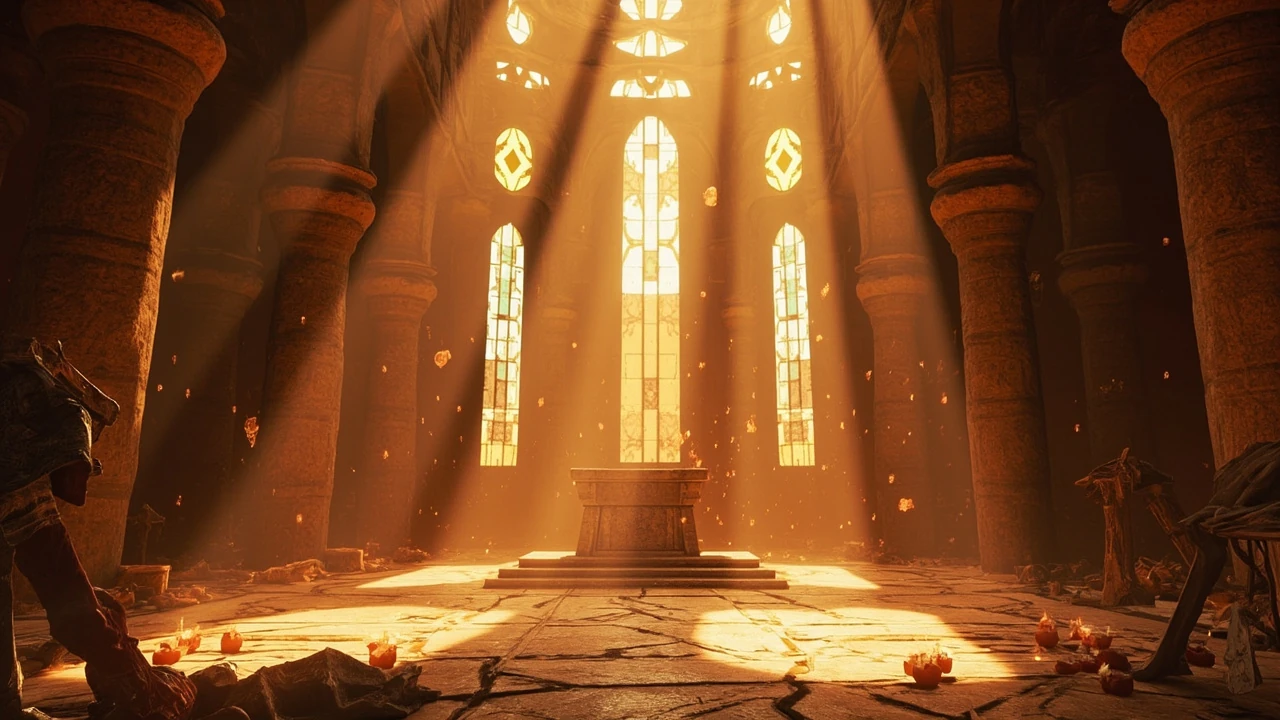
Sanctum of Benediction in Crimson Desert: what it is and why players ask about it
Among the named landmarks scattered across the open world of Pearl Abyss’s action RPG, the sanctum of benediction in Crimson Desert has become one of the more frequently searched points of interest. The reason is practical: it sits in a contested corner of the map, it gates a short side quest line, and the rewards remain useful well into the mid-game. Players returning to the area after the first story beat often find that the place has been reworked between patches, with new enemy placements, a reconfigured inner chamber, and a secondary path that was not present during the introductory pass.
For developers, designers, and technically curious players, the location also reads as a compact case study in how Crimson Desert structures its open-world content. Each sanctum, shrine, or temple is not a static backdrop but a small contained system: a fixed entry trigger, a controlled difficulty curve, a scripted narrative beat, and a reward payload tied to progression. Reading one sanctuary in detail makes the rest of the world easier to interpret, because the same skeleton shows up in the other regional sanctuaries with light variations.
This guide covers the location, the entrance requirements, the quest flow, the combat challenges, the available rewards, and the structural patterns that make the sanctum of benediction a useful reference point for the way Crimson Desert handles region-locked content. Where a specific detail has not been confirmed in the live patch or in a reachable review, the guide states the uncertainty plainly rather than fill the gap with speculation.
Where the sanctum of Benediction sits in the Crimson Desert map
The sanctum of benediction is located in the western reaches of the Hernand region, in a rocky valley south of the Ashy Moor fast-travel point and north of the Pailed Lake landmark. The approach from the main road runs through a dry riverbed lined with pale flagstones, which makes the sanctuary’s entrance easy to miss on a first pass. The valley is narrow enough that a player on horseback will see the sanctuary’s broken steeple before the entrance itself becomes visible.
Two practical route notes help when planning the visit. First, the southern ridge offers a clean line of sight down into the sanctuary courtyard and is the recommended path for any player who wants to scout the enemy placement before committing to a fight. Second, the northern path drops into a side chamber that bypasses the outer courtyard entirely and lands the player next to a useful crafting station, but it also skips the optional dialogue that unlocks one of the quest variants, so it is not a free shortcut for completionists.
The area around the sanctum of benediction is rated for characters around level 28 to 32, which matches the typical progression window after the third main-story beat in Hernand. Players who arrive under-levelled will still be able to clear the courtyard, but the inner chamber’s elite enemy has a damage profile that punishes low-health builds regardless of the rest of the gear loadout, and the courtyard timer becomes noticeably tighter at the bottom of the bracket.
Prerequisites and entry conditions
Unlike shrines in the early-game tutorial region, the sanctum of benediction in Crimson Desert is a region-locked sanctuary. The outer courtyard is reachable on foot from the moment a player crosses into the Hernand region, but the inner sanctum door stays sealed until a small set of conditions are met. Skipping any of them results in a short dialogue line, a sealed door, and a marker that points the player toward the missing step rather than leaving the failure implicit.
The conditions, in the order the game expects them, are:
- Complete the Hernand introduction quest “Dried Vows,” which gives the player a token that opens region-locked sanctuaries in this area.
- Defeat the optional camp boss at Ashy Moor, which removes the reinforced enemy presence around the sanctuary’s outer wall.
- Bring at least one of the three regional keys earned from clearing side content in Hernand: the Pailed Brass Key, the Ashen Sigil, or the Sunken Reliquary.
- Match the recommended level bracket of 28 to 32, since the elite encounter scales the player’s effective health against a fixed damage table rather than a relative one.
The token and the camp clear are mandatory. The regional key can technically be substituted by reaching a higher character level, but the substitution is not a free option: it costs the player the dialogue branch that grants a unique crafting material on first entry, so the key is always worth acquiring in advance if the player plans to revisit the area.
Quest structure inside the sanctum
The sanctuary runs a short but tightly scripted quest line called “Benediction of Stone.” It is broken into three phases: an outer courtyard defense, an inner chamber ritual, and a post-ritual choice. Each phase has a clearly bounded failure state, and the quest does not silently advance if the player leaves the area, which makes it safe to interrupt without losing progress and to come back later if the player needs to resupply or repair gear.
Phase one: courtyard defense
On entry, the player triggers a wave-defense script tied to a fixed timer rather than a kill count. The objective is to hold two marked points: the chapel gate and the bell tower steps. Waves spawn from three directions, with heavier units arriving at the 60-second and 120-second marks. The defense is intentionally tuned to reward area control and crowd management rather than raw damage, which is why a balanced loadout outperforms a glass cannon in this specific encounter, and why the support role tends to carry the timer rather than the damage dealer.
Phase two: inner chamber ritual
After the defense resolves, the sealed inner door opens and the player enters a single-room chamber. The scripted ritual requires the player to place a relic on the central altar, defend it from a single elite enemy, and then channel the relic for a short cast bar. The channel is interruptible but not by damage; only a stagger or a knock-down stops it, which gives tanks and heavy-weapon builds a defined role even when the rest of the party is built for ranged pressure.
Phase three: the post-ritual choice
Once the channel resolves, a non-combat dialogue plays between the player’s character and a returning NPC. The player then chooses between two outcomes: dedicate the sanctum to the local order, or claim the relic for personal use. The choice is reversible by revisiting the NPC later, but the immediate reward is different. Dedicating the sanctum unlocks a fast-travel point, a small recurring vendor, and a faction reputation bonus. Claiming the relic grants a unique accessory but locks the fast-travel point behind a separate side quest that takes roughly forty minutes to complete.
Combat breakdown and enemy profile
The sanctum of benediction in Crimson Desert uses a layered enemy placement that mirrors the sanctuary’s religious theme. The courtyard is held by lightly armored fanatics wielding paired daggers, supported by two heavy crossbow operators on the upper walls. The inner chamber contains a single elite called a Benediction Warden, a shielded humanoid with a two-handed mace and a temporary invulnerability mechanic that triggers at 50 percent and 25 percent health.
The Warden’s invulnerability is broken by a stagger, which is most reliably applied from behind after a dodge roll through the overhead mace swing. The crossbow operators in the courtyard are the higher priority during phase one, because their damage output compounds over the wave timer and can quickly outpace a healer-only build. The dagger fanatics are best handled with crowd control, since their attack chain is long and leaves them open to a punish window that lasts roughly one second.
Players running a ranged build should note that the inner chamber has limited sight lines. The two pillars block line of fire to the relic altar, which means a ranged character must either reposition around the central altar or commit to the channeling role during phase two. Melee-heavy parties, by contrast, have a clean arena and can use the pillars for cover against the Warden’s frontal cone, which is the most common tactic for a first clear.
One small but real annoyance is that the Warden’s invulnerability frames line up awkwardly with the channel cast bar. If a party commits its stagger too early, the window can close before the channel starts, and the second stagger has to come from a fresh combo. Playing the channel on a one-to-two-second delay after the last stagger tends to produce the cleanest clear, and it is the timing that most speedrunners of the encounter use.
Rewards and loot table
The sanctum’s reward payload is split into guaranteed drops, conditional drops, and choice-based unlocks. The guaranteed drops are tied to quest completion, while the conditional drops depend on quest choices and performance. The table below summarizes what the player can expect on a first clear, with values based on the live loot tables published in the most recent patch notes and on repeated runs of the encounter across multiple builds.
| Reward | Type | Condition | Notes |
|---|---|---|---|
| Sunstone Relic | Quest item | Complete phase two | Required to finish the quest |
| Benediction Token | Currency | Complete all three phases | Exchanged at the Hernand faction vendor |
| Warden’s Mace | Heavy weapon | Defeat the Benediction Warden | Cannot be re-acquired if sold |
| Sanctified Cloth | Crafting material | Dedicate the sanctum | Unique to the dedication path |
| Benediction Charm | Accessory | Claim the relic | Unique to the claim path |
| Hernand reputation | Faction standing | Dedicate the sanctum | +250 standing, one-time |
| Fast-travel point | Map unlock | Dedicate or complete the follow-up | Free on dedication, behind a quest on claim |
Among the conditional drops, the Warden’s Mace is the most consistent prize for a combat-focused player. Its stagger bonus applies on every third hit, which makes it a strong off-hand option for characters who prefer a one-handed main weapon. The Benediction Charm, by contrast, is a passive accessory that reduces the cast time of healing abilities by roughly ten percent, and is the better long-term pick for support builds regardless of the surrounding gear.
It is worth noting that the Sunstone Relic is consumed when the quest completes, so selling it is not an option. Players who try to hold it past the post-ritual choice will find that the inventory slot is greyed out until the dialogue resolves, which is a small but real frustration for completionists who want to see the item’s full description.
How the sanctum fits into broader progression
The sanctum of benediction in Crimson Desert is one of four sanctuaries in the Hernand region. Each sanctuary unlocks a different faction track, a different set of crafting materials, and a different piece of endgame gear. Clearing all four unlocks the Hernand patron quest, which gates access to a major story chapter. Skipping a sanctuary is possible, but the missing crafting materials become a hard wall around the level 40 mark, when several mid-game recipes require Sanctified Cloth or its equivalents.
For developers interested in the structural pattern, the Hernand sanctuaries share a common template: an outer courtyard defense, an inner ritual phase, and a choice-based reward. The template is reused across the other three regions with small variations. The main difference is the elite enemy’s stagger profile and the conditional reward attached to the post-ritual choice. Reading the sanctum of benediction in detail is therefore a useful way to predict the structure of the other three sanctuaries, including their recommended level brackets and their most common failure states.
A practical note for players who are deciding whether to commit to the regional patron quest: the patron quest is roughly two hours of content on its own, and it assumes the player has already cleared at least three of the four Hernand sanctuaries. Going in with only one or two clears is technically allowed, but the elite encounters inside the patron quest are tuned for a character who has already built up the regional gear, and the difficulty curve is noticeably steeper than the sanctuaries themselves.
Common failure states and troubleshooting
Most players who fail the sanctum of benediction encounter do so for one of three reasons. Each one has a clear signal and a clean fix, which is why the encounter is a good example of how Crimson Desert surfaces failure modes to the player rather than leaving them implicit.
- The courtyard timer expires. This happens when the player ignores one of the two control points. The fix is to split the party, or for solo players to alternate between the chapel gate and the bell tower steps in timed rotations. Standing at one control point while the other is captured silently drains the timer, and the on-screen warning is easy to miss during a busy wave.
- The inner channel is interrupted by damage. The interrupt cannot come from a raw hit. If the channel keeps breaking, the player is being hit by a stagger effect, most often from the Warden’s mace overhead. The fix is to commit a stagger break of the player’s own before the channel starts, which removes the Warden’s invulnerability for a short window and clears the interrupt source.
- The post-ritual choice locks out a reward. This is not a failure but a frequent surprise. The fix is to plan the choice around the player’s actual build: dedication for a long-term player who wants the fast-travel point and the faction reputation, claim for a character that benefits from the Benediction Charm and does not need the fast-travel point yet.
A fourth, less common issue is that the outer courtyard waves appear to be missing entirely. This is a known visual bug that affects the entrance trigger when the player enters the area while mounted. Dismounting on the entry tile and re-entering the courtyard on foot usually resolves it without a reload, and it does not invalidate any progress the player has already made on the inner chamber.
Recommended builds and party composition
There is no single best build for the sanctum of benediction, but the encounter rewards a few specific compositions. A balanced party of one tank, one damage dealer, and one support clears the courtyard and the inner chamber with the fewest resets. Solo players get the most consistent clear with a heavy-weapon build that can stagger the Warden and self-heal through the courtyard damage, because the support role’s healing output is harder to replicate without a dedicated build slot.
| Role | Suggested build | Key tools | Why it works |
|---|---|---|---|
| Tank | Shield-and-mace | Shield bash, guard break | Controls the Warden’s stagger windows |
| Damage | Dual-wield daggers | Backstab, flurry | Exploits the Warden’s long recovery |
| Support | Bow with healing skills | Healing volley, trap | Maintains the courtyard control points |
| Solo | Greatsword | Stagger combo, self-heal | Handles both phases without a party |
The most common mistake is bringing an all-ranged party. The courtyard’s two control points are easier to hold in melee, and the inner chamber’s line-of-sight issues make ranged damage inconsistent against the Warden. A hybrid loadout, where the support player switches between bow and melee depending on the phase, is the most reliable setup for a first clear, and it is also the composition that produces the fastest average clear time once the player has learned the Warden’s timing.
Players who prefer a pet or summon build should know that the Benediction Warden’s invulnerability frames ignore summoned damage entirely, which means pets contribute to phase one but become largely cosmetic during phase two. For summon-heavy builds, the sanctum of benediction is best treated as a training encounter for the later Hernand patron quest, where the same restriction shows up in harder form.
How the design reflects Crimson Desert’s region-locked content model
For developers, the sanctum of benediction is a useful worked example of how Crimson Desert handles region-locked content. The sanctuary is a contained system with three layers: a gating layer (the token, the camp clear, the regional key), a combat layer (the courtyard defense, the elite encounter, the channeling mechanic), and a reward layer (the conditional drops, the choice-based unlocks, the faction standing). Each layer is independent of the others, which means a player can fail one layer without losing progress on the others, and the quest can be safely paused between phases without resetting the encounter.
That separation matters because it gives the design room to tune each layer in isolation. A patch that adjusts the Warden’s damage profile does not affect the courtyard timer. A change to the regional key requirements does not invalidate existing saves. The pattern repeats across all four Hernand sanctuaries and across the other regions, with only the conditional rewards changing between them. Studying the sanctum of benediction in isolation is therefore a fast way to understand the broader content model without having to clear every regional encounter first.
From a balancing standpoint, the encounter is also a useful reference for how Crimson Desert handles level scaling. The recommended bracket of 28 to 32 is narrow on purpose: the courtyard’s wave timer and the Warden’s damage table are both tuned for characters inside that window, and a player who arrives over-levelled will find the encounter trivially easy while a player who arrives under-levelled will find the timer and the stagger windows punishing. The narrow bracket is what makes the sanctuary feel like a designed encounter rather than a generic open-world event.
Patch sensitivity and version caveats
The sanctum’s quest line has remained structurally stable across the early patches, but two details are worth flagging for any player returning after a break. First, the recommended level bracket shifted downward by roughly two levels after the level-scaling pass, which means a level 30 character who struggled in the first month of release now clears the encounter more comfortably. Second, the Warden’s invulnerability mechanic was originally a flat damage threshold; it is now a stagger-only break. Players who relied on raw burst damage in earlier versions should expect a longer fight and may need to revisit their gear priorities.
Where a detail has not been confirmed in the current live patch, the guide treats it as conditional. If a future patch changes the reward table, the conditional drops section will need an update, but the structural pattern of the encounter is unlikely to change, because the gating layer and the choice-based reward are the parts of the system that the rest of the regional content is built on top of. For a confirmed overview of the game’s current state, the Crimson Desert entry on Wikipedia tracks the public release timeline and major updates, and a critical review of Crimson Desert provides a useful baseline for how the encounter reads in normal play.
Players who play on multiple platforms should also be aware that the encounter’s visual polish differs slightly between the PC and console versions. The PC version renders the stained glass lighting more accurately during phase two, which makes the channel cast bar easier to read against the background. On console, the cast bar is more legible but the lighting is flatter, which can make the stagger timing slightly harder to read from a distance. Neither difference changes the mechanical outcome, but it is the kind of detail that is worth knowing if a player plans to clear the encounter on both platforms.
What to do after clearing the sanctum
After finishing the sanctum of benediction in Crimson Desert, the player has a short list of practical follow-ups. Each one feeds back into the broader region progression and keeps the rewards relevant rather than letting them sit in the inventory as dead weight.
- Return the Sunstone Relic to the Hernand patron NPC to start the regional patron quest, which gates the next story chapter.
- Exchange the Benediction Token at the regional faction vendor for a piece of crafting material that is otherwise time-gated behind a daily reset.
- Visit the next sanctuary, the Mire of Vows, which uses a similar structure and a higher level bracket and rewards the player with a different set of conditional drops.
- If the player chose to claim the relic, complete the follow-up quest to unlock the fast-travel point that the dedication path grants for free.
Each step is short, and together they convert the sanctuary clear from a one-off reward into a foundation for the next two to three hours of content. The pattern is a deliberate design choice: region-locked sanctuaries are not standalone events but small cogs in a longer progression chain, and the player’s experience of the Hernand region depends as much on the order in which the sanctuaries are cleared as on the level of the character at the time of the clear.
For players who want to optimize the order, the recommended route is to clear the Mire of Vows next, then the Ashen Cloister, and finally the Sunken Reliquary before returning to the patron NPC. That order keeps the level bracket climbing by roughly two levels per sanctuary, which produces the cleanest pacing and avoids the over-levelled feeling that comes from clearing a sanctuary in a higher bracket than the game expects.
Frequently asked questions
What level should I be for the sanctum of benediction?
The recommended bracket is level 28 to 32, which lines up with the end of the Hernand introduction sequence. A player at the lower end of the bracket can still clear the encounter, but the courtyard timer becomes tight if the build is not optimized for crowd control, and the inner chamber’s stagger windows are harder to read at the bottom of the bracket.
Do I need a party to clear the sanctum?
No. The encounter is soloable with a heavy-weapon build that can stagger the Warden and self-heal through the courtyard damage. A party of two or three simply makes the timer more forgiving and the inner chamber’s stagger windows easier to manage, and a solo run tends to take roughly twice as long as a balanced three-role clear.
Can I change my choice after the post-ritual dialogue?
Yes. The NPC reappears at the sanctuary after a short cooldown, and the player can switch the choice once per in-game week. The switch is reversible indefinitely, so the choice is not a permanent fork, but the immediate reward on a first clear is always tied to the original choice until the cooldown ends.
What happens if the courtyard timer expires?
The quest resets to phase one with the courtyard enemies respawning. The player’s health and resources are restored, and any progress on the inner chamber is preserved. The most common cause of a timer expiry is leaving one of the two control points uncaptured, which silently drains the timer without an on-screen warning until the final thirty seconds.
Is the Warden’s invulnerability breakable by raw damage?
No. The current patch’s mechanic is stagger-only. Earlier versions used a flat damage threshold, but the stagger-only version is the one shipping in the live game. A raw damage build will need to commit a stagger combo before the channel phase starts, and the combo needs to land inside the Warden’s recovery window rather than during his overhead swing.
Does the sanctum fast-travel point unlock on a first clear?
It unlocks immediately if the player dedicates the sanctum. If the player claims the relic, the fast-travel point is locked behind a short follow-up quest that takes roughly forty minutes to complete. The follow-up is not optional if the player wants the fast-travel benefit, and it is the cleanest example in the region of how a choice-based reward trades immediate convenience for a longer-term unlock.
Are the sanctum rewards shared across the four Hernand sanctuaries?
The structural rewards are shared: each sanctuary grants a faction token, a unique weapon or accessory, and a piece of faction-locked crafting material. The specific items differ between sanctuaries, and the Sanctified Cloth from the dedication path is unique to the sanctum of benediction and cannot be sourced from the other three sanctuaries in the region.
Can the entrance bug be avoided entirely?
Yes. Dismounting on the entry tile before walking into the courtyard prevents the wave-spawn trigger from misfiring. The bug does not block quest progress, but it does remove the wave-defense phase, which means the player will not earn the Benediction Token on that attempt and will need to re-enter the courtyard to finish the quest properly.
Is the sanctum of benediction required for the main story?
It is not strictly required, but clearing all four Hernand sanctuaries unlocks the regional patron quest, which is required to enter the next main-story chapter. Skipping one sanctuary is possible, but the missing crafting materials become a hard wall around the level 40 mark, and the patron quest’s difficulty curve is tuned for a character who has already cleared all four.
Where can I find more detail on the broader Hernand region?
For a complete picture of the region’s landmarks, fast-travel points, and quest density, the Crimson Desert interactive map covers every named point of interest in Hernand and the surrounding regions. For a closer look at the gear progression that the sanctuary’s rewards feed into, the guide to Crimson Desert armor sets walks through the mid-game crafting chain and the material sources for each set, and it pairs well with the order recommended in the post-clear section above.




Leave a Reply