

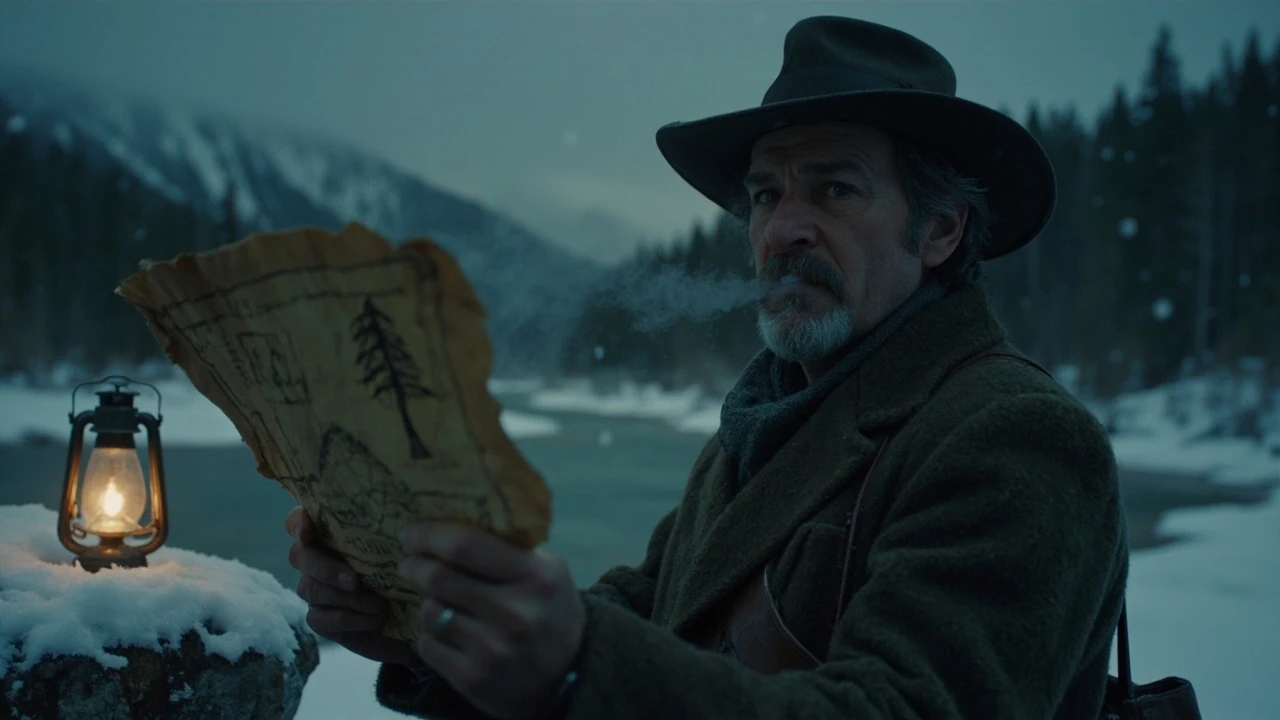
Jack Hall gang map 1: solving the first RDR2 treasure hunt
Finding the first clue in Red Dead Redemption 2’s Jack Hall Gang treasure quest begins with a hand-drawn treasure map that players pick up near the frozen shoreline of O’Creagh’s Run. The map is small, easy to miss if you are focused on the main story, and the drawing is stylized enough that many players struggle to translate its lines into a real-world location. The puzzle is solvable in a single in-game day, and the path it sets you on is the prologue to a much longer chain that finishes with one of the more substantial single payouts in the open world.
This guide treats the Jack Hall gang map 1 step as a player task with a real development context. Understanding how the treasure map is staged, why its landmarks are chosen, and what the puzzle’s logic teaches you about the game’s wider design helps you solve the rest of the chain faster. The same instincts also help if you are studying Rockstar’s open-world quest design as a developer, because the Jack Hall chain is a clean example of how environmental storytelling, map reading, and incremental rewards are layered together.
Before you ride out, it is worth keeping in mind that the map’s drawing is not a surveyed chart. The lines are impressionistic, the curves are exaggerated, and the X is a visual habit borrowed from pulp adventure fiction rather than a precise coordinate. The puzzle rewards players who can translate a sketch into a real horizon, and that translation is the core skill the rest of the chain builds on.
Where to find the Jack Hall gang map 1
The first map is not a quest reward. It is a world item that you can pick up at any time after the first chapter transition, which means you do not need a stranger to hand it to you and you do not need to wait for a stranger mission to trigger. Heading there early is fine, but you should know that the puzzle takes you out of familiar territory and into a colder, more hostile part of the map.
- Region: Grizzlies East, Ambarino.
- Specific location: along the southwestern shore of O’Creagh’s Run, the lake east of Valentine and north of the Heartlands.
- Marker: a small wooden post sticking out of the snow with a folded paper pinned to it.
- Trigger: the item enters your satchel automatically when you interact with it; no journal entry is required to start.
When you examine the map from the satchel, the paper shows a rough sketch of a river bend with a tree, a rock formation, and a small X. The drawing is intentionally ambiguous, but the silhouettes match the real in-game landscape if you know where to look. The item is small enough that it is often overlooked by players who are chasing the main story, and the surrounding terrain is quiet enough that you will not get ambushed while you stop to read it.
The map is placed on the side of the lake that faces the road out of Valentine, which means the intended approach is to ride north from the Heartlands, follow the trail along the ridgeline, and curve down to the shoreline. Approaching from the north or the east is possible, but it adds a longer ride and a more technical descent in the snow.
How the Jack Hall gang map 1 puzzle works
Treasure maps in RDR2 follow a repeating structure. The map gives you a stylized drawing, the world gives you a matching real landmark, and the reward is buried in a small dig spot close to that landmark. The Jack Hall chain uses three of these maps in sequence, and map 1 is the entry point. Each map in the chain is harder to interpret than the last, and the difficulty curve is part of the design.
The drawing on map 1 is meant to depict a frozen river bend. The X sits on a patch of ground near a distinctive tree and a rock wall. If you have spent any time in the Grizzlies, you already know that the area has many frozen streams, several rock walls, and dense pine cover. The puzzle is designed so that you can guess, walk, and correct, but the intended solution is the place where all three landmarks line up at once.
There is also a narrative layer tucked into the design. The Jack Hall Gang was a real outlaw outfit operating in the late nineteenth century, and the chain borrows that name and a thin backstory for the maps and the flavor items at each dig. If you want a wider historical reference for the gang itself, the Wikipedia entry on Jack Hall is a useful starting point. The in-game gang is fictional, but the prop design and the flavor text lean on that real-world history to make the treasure feel grounded.
Step-by-step walkthrough to the dig site
The fastest route is to start at the post where you picked up the map and follow the river downstream, but you can also approach from the south if you are already at Emerald Ranch or Valentine. The two approaches meet at the same dig site, and neither is significantly longer than the other once you account for the time it takes to navigate the snow.
- Ride or fast travel to O’Creagh’s Run, then move to the western shore of the lake.
- Look for a sharp bend in the stream that flows out of the lake, where a rock face rises on the inner bank.
- Find the lone dead tree on the outside of the bend. The drawing on the map exaggerates the curve, but the dead tree and the rock face are the two anchors that will not move between sessions.
- Walk the bank slowly. The dig spot is a small dark patch of disturbed earth at the base of the rock face, within a few meters of the dead tree.
- Use the eagle-eye ability to highlight the area. You will see a faint yellow trail of investigation points that leads to the exact dig spot.
- Crouch, equip a knife or any melee tool, and press the interact prompt to dig.
The first dig gives you a follow-up map, not the final reward. That is by design, and it is the same pattern used in the High Stakes treasure, the Poisonous Trail, and the Le Tresor Des Morts chains. The pacing matters: if the first dig gave you the gold bar outright, the chain would feel like a single task rather than a small adventure, and the sense of progression would be lost.
Players who want to be thorough can also scout the bank on foot before they dig. The dig spot is on a flat patch of ground, and there is enough room to set up a small camp if you want to cook a meal or warm up before you move on. That kind of preparation is rarely needed, but it is useful if you are tracking a long play session and want to top off your cores before the next leg of the ride.
What is inside the first dig
The first dig in the Jack Hall chain is intentionally modest. It contains a second, more detailed treasure map and a small flavor item that frames the story of the Jack Hall Gang. The flavor item matters less than the next map, but it is the reason the chain is named after the gang rather than after the geographic location. The flavor text on the item is short, and most players will read it once and move on, but it is a small piece of the world-building that the chain relies on.
From a design standpoint, the small first reward is the carrot. Players who find it learn that the chain pays out, and they keep moving. From a player’s standpoint, the second map is what you actually want, because it advances the puzzle. The gold bar at the end of the chain is the long-term reward, but the second map is the immediate goal, and the chain is paced so that you always have a clear next step.
There is also a small loot table attached to the first dig, which can include a few consumables or crafting materials depending on your luck. The consumables are not a major part of the reward, but they are a useful buffer if you have been burning through tonics on the ride up to the lake.
Why the Jack Hall gang map 1 chain exists in RDR2
Rockstar’s open worlds tend to be full of side content that is busy on the surface but light on mechanical depth. Treasure hunts are the exception. They use the world as a literal puzzle, and they reward careful observation over combat skill. The Jack Hall chain is one of the older examples in RDR2, and it was likely prototyped early, because the structure is so clean. The first map is essentially a tutorial for the rest of the chain, and the chain itself is essentially a tutorial for the rest of the game’s side content.
Three design choices stand out:
- Real-world landmarks are used as puzzle pieces. Players who learn to read a real horizon and not just a HUD compass get the reward. This is the same pattern used in The Witcher 3’s scavenger hunts and in Elden Ring’s map fragments, and it is a good example of how open-world games can lean on spatial literacy as a core skill.
- The chain is paced in three beats. Each map is harder to interpret than the last, and each dig rewards you with the next clue. The final dig pays the chain off in a way that feels earned, and the pacing keeps the player invested even when a single map takes two or three attempts.
- Story is delivered through props, not cutscenes. The flavor text on the maps and the items at each dig site give you the Jack Hall Gang’s backstory without ever pulling the player out of exploration. The narrative is a side effect of the gameplay, which is one of the reasons the chain feels so cohesive.
If you are studying open-world quest design, the Jack Hall chain is a useful reference because it shows how much narrative and pacing can be carried by objects and locations rather than by cinematics. The chain is small enough to clone in a vertical slice and rich enough to be worth a postmortem, and it is one of the cleaner examples of the genre in modern open-world design.
Map reading tips that make the puzzle easier
The map is hand drawn on purpose, so do not treat the angles as literal. Instead, treat each sketched element as a category of landmark and look for a real match in the world. A handful of habits will speed this up. The most important habit is patience: the map is a sketch, and the world is large, and the puzzle is solved by matching one to the other rather than by following a line on the screen.
| Map element | Real-world landmark to look for | Why it works |
|---|---|---|
| Curved line | River or stream bend | Rivers in Ambarino follow ridgelines, so the curve is a directional clue. |
| Tall narrow shape | Dead or isolated tree | One prominent tree on a bank is much easier to find than a dense forest. |
| Diagonal hatching | Rock face or cliff | Rock faces in snowy regions are easier to spot than trees against snow. |
| X mark | Dig spot, not literal X | The X is approximate; the real dig site is a few meters from the closest landmark. |
| Smaller symbols | Cabin, fence, or ruin | Man-made structures near the dig site are the strongest secondary anchors. |
| Top-of-page notation | Compass heading or river name | Some chains include a sketched compass or label that points to a specific region. |
Use eagle-eye often, especially if you have been riding for a while. It highlights investigation spots as a faint yellow trail, and the trail will always lead to the dig site if you are in the right general area. If the trail does not appear, you are not in the right place, and a short ride in a new direction is usually enough to bring it back. Players who try to brute-force the dig by spamming the interact prompt in the wrong area will waste time, and the prompt only works on the actual dig spot.
It also helps to think about the season. Ambarino in chapter 2 is frozen and snowed in, which means the rock face and the dead tree are the two most visible landmarks. In a different season, the same location would be greener and harder to read, so the chain is designed around the snowy palette. That is one of the small craft details that makes the puzzle feel deliberate rather than incidental.
Common mistakes when solving jack hall gang map 1
Most players who stall on the first map make one of three mistakes. None of them are hard to fix, but they are easy to repeat if you push forward without checking. The mistakes are all symptoms of the same underlying problem: players trust the X on the map more than they trust the landmarks around them, and the X is the least reliable element of the drawing.
- Picking the wrong river bend. Ambarino has many small streams. The intended bend sits on the outlet of O’Creagh’s Run, not on a random creek further north. If you find a rock face and a dead tree but no dig spot, you are probably on the wrong bend.
- Ignoring the dead tree. The drawing on the map exaggerates the tree, but the real marker is subtle. Walk the bank and look for a single dead tree rather than a cluster. The tree is the anchor that the rock face is measured against, and it is the easiest element to miss if you are moving too fast.
- Searching at the wrong time of day. The rock face looks very different at noon and at dusk. If you cannot see the yellow trail, ride a short distance away and approach from a new angle. Changing the time of day can also help, and a short camp is the easiest way to skip ahead a few hours.
None of these are puzzles in the strict sense. They are common-sense corrections, and they are worth trying before you assume the map is broken or the reward is somewhere else. A common player habit is to assume the puzzle is glitched, but the Jack Hall chain is one of the more reliable chains in the game, and the puzzle is solvable every time as long as you are in the right place.
Best loadout for the Jack Hall gang map 1 hunt
The Grizzlies in winter are hostile. You will ride through predator and gang territory, and weather can drop your cores faster than in the Heartlands. A small loadout change makes the trip much smoother, and most of the picks below are about giving yourself margin rather than about raw power. The map itself does not require any of these items, but the ride to and from the dig site does.
| Slot | Suggested pick | Reason |
|---|---|---|
| Weapon 1 | Lancaster Repeater | Reliable at medium range for wolves and ambushes. |
| Weapon 2 | Bow with improved arrows | Quiet option for hunting while you scout the dig site. |
| Melee | Any knife | Required for the dig interaction; also a last-ditch weapon. |
| Horse | Turkoman or Missouri Fox Trotter | Both handle snow well and have enough stamina for a long ride. |
| Satchel | Full tonics, at least three cooked big game meals | Core drain is severe in the snow; plan food before you ride. |
| Clothing | Cold-weather outfit | Prevents the slow core loss that comes from being underdressed in Ambarino. |
| Camp | Fast travel from nearest campfire | Reduces the ride and lets you top off cores before the final approach. |
None of these picks are mandatory. The puzzle is solvable with whatever you have in the open-world slot, but the loadout above is the one that gives you the most margin if you hit a random encounter on the way back. Players who try to brute-force the chain with a default loadout usually finish it, but they tend to use more resources than they need to, and a small amount of preparation saves a lot of consumables.
If you are running the chain on a low-level character, the most important items are food and a knife. Everything else can be improvised, but the core drain in the snow is real, and the dig interaction requires a melee weapon. The chain is friendly to new players, and the loadout is a polish step rather than a requirement.
Player mistakes versus designer intent
It is worth pausing on the gap between the way players approach the map and the way the designers expected it to be approached. Most players look at the X first. The designers put the X on the map to satisfy a visual habit, not because the X is the strongest clue. The strongest clue is the combination of the dead tree and the rock face, and that combination is what the actual in-game world uses to anchor the dig site.
If you play the puzzle the way the designers intended, you will solve map 1 in a single attempt. If you play it the way the X suggests, you may wander the bank for ten minutes before you backtrack. This is one of the more interesting lessons in the chain, and it is the reason many players say that the Jack Hall Gang quests feel more like reading a real map than solving a video-game puzzle.
The same gap shows up in other chains. The High Stakes treasure rewards players who look at the rock formation first and the X second. The Poisonous Trail rewards players who notice the lone tree before they read the inscription. The Le Tresor Des Morts chain rewards players who can match a stylized drawing to a real ruin. The pattern is consistent, and the Jack Hall chain is the cleanest introduction to it.
For developers, this is one of the more useful design lessons in the chain. Players default to the most legible element of a puzzle, and designers can either fight that habit or lean into it. The Jack Hall chain leans into it: the X is legible, but it is wrong, and the player who figures that out is the player who solves the puzzle cleanly.
Continuing the Jack Hall chain after map 1
Once you have the second map, the chain continues north and west toward Colter. The second map depicts a rock formation that is easy to confuse with several other formations in the region, so the same skill set applies: read the silhouette, not the line, and trust the secondary anchors. The third map is the most ambiguous of the three, and it is the one that the community most often gets wrong on a first attempt.
The final reward is a gold bar, which is a large lump sum of cash that can fund the rest of the early-game economy. By the time you finish the chain, the puzzle has taught you a method that you can reapply to other treasure quests, and the cash lets you buy the satchels, weapons, and horse upgrades that make the next chain easier to chase. A single gold bar is enough to cover most of the early-game upgrades, which is one of the reasons the Jack Hall chain is recommended as a first stop for new characters.
Players who finish the chain often go on to the High Stakes treasure next, because it uses the same skill set and pays a similar reward. From there, the Poisonous Trail and Le Tresor Des Morts are the natural follow-ups, and the four chains together form a small curriculum in stylized map reading that the rest of the game’s side content builds on.
How jack hall gang map 1 fits into RDR2’s wider side content
Side content in RDR2 is split into several families: stranger missions, bounty hunts, gang hideouts, and treasure chains. Treasure chains are the most replayable of the four for new players, because they require no combat, no reputation, and no time-gating. The Jack Hall chain is one of three classic chains that any player can start in chapter 2, and it is the chain most often recommended as the first stop for a new character.
From a development standpoint, treasure chains are also one of the cheaper content types to ship. They require a small set of map props, a few dig spots, and a small reward table. The reason they feel rich is that the world already exists. The Jack Hall chain reads as a fifty-hour experience because the open world is the content; the chain itself is mostly a thin layer of map art and dig interactions on top of it.
That thin layer is the interesting part. The chain is essentially a small set of props and a few scripts, but it uses the world as the UI, and that choice is what makes the puzzle feel like a real hunt. A treasure chain that relied on a minimarker or a glowing objective would be much cheaper to build, but it would also be much less interesting to play, and the Jack Hall chain is a good argument for the harder design path.
Players who are mapping out their first few in-game weeks tend to schedule the Jack Hall chain before the stranger missions in the region, because the chain is short and the rewards are immediate. That scheduling is also a small design lesson: the chain is paced so that it can be finished in a single session, and the rewards are front-loaded enough that the player feels progress even if they only put in an hour of play.
Studying the Jack Hall chain as a designer
For developers reading this as a case study, the Jack Hall chain is a useful reference for several reasons. The chain is small, the structure is portable, and the design choices are explicit enough to be worth replicating. It is also old enough to have been studied in detail, and the community has a clear picture of what works and what does not.
- It uses the world as the UI. The map draws real landmarks, and the player must match them to the in-world geometry. There is no minimarker that says “dig here.” This is a strong design choice, because it makes the player feel like they are solving a real puzzle rather than following a quest arrow.
- It paces rewards across multiple steps. The first dig gives a follow-up map, not the final payout. That pacing mirrors the micro-progression of a tutorial and keeps the player invested. The chain also avoids the trap of front-loading the reward, which would make the later steps feel like busywork.
- It uses props to deliver narrative. The flavor items at each dig give you the gang’s history without breaking the player’s flow. The story is a side effect of the treasure hunt, not a separate quest layer, which keeps the chain cohesive.
- It scales difficulty with map ambiguity. The first map is the easiest to read, the second is harder, and the third is the hardest. The chain teaches by repetition, and the player who solves map 1 has already learned the method they need for map 3.
- It gives the player a real reason to explore. The chain is set in a part of the map that new players rarely visit, and it rewards that exploration with both a puzzle and a payout. That is a good use of side content, because it pulls the player off the main path without forcing them.
If you are building your own open-world quest system, the Jack Hall chain is small enough to clone in a vertical slice and rich enough to be worth a postmortem. The design is a good baseline, and the structure is portable to most engines. The chain also has the advantage of being widely documented, so it is easy to find player feedback and design discussion to draw on.
The chain is not perfect. The third map is ambiguous enough that some players never solve it without a guide, and the flavor text is thin enough that the gang’s backstory is mostly implied. Those are real limitations, and they are worth noting if you are using the chain as a reference. The chain is best treated as a baseline rather than a finished design, and the lessons it teaches are about structure and pacing more than about polish.
Frequently asked questions
Where exactly do I find the jack hall gang map 1 in RDR2?
The map is on a wooden post along the southwestern shore of O’Creagh’s Run, in the Grizzlies East region of Ambarino. It is a world item, so you can pick it up at any time after chapter 2. There is no quest marker, and no journal entry is required to start.
Do I need to be in a specific chapter to start the Jack Hall Gang treasure?
No. The first map is a world item that any player can collect. The puzzle does not require chapter 3 or later, and the chain is friendly to low-level characters because the route through Ambarino can be done while avoiding most combat.
What does the jack hall gang map 1 actually show?
It is a hand-drawn sketch of a river bend with a dead tree, a rock face, and a small X. The drawing is stylized, but the silhouettes match the real bank of the stream that flows out of O’Creagh’s Run. The intended dig site sits at the base of the rock face, next to the dead tree.
What reward do I get from the first dig of the Jack Hall chain?
The first dig contains a follow-up map and a small flavor item tied to the Jack Hall Gang. The big reward is the final dig, which is a gold bar. The chain is paced so that each step teaches you how to read the next map.
Can I solve jack hall gang map 1 without eagle-eye?
Yes. Eagle-eye highlights the investigation trail in yellow and is a useful shortcut, but you can solve the map by sight alone. The dead tree and the rock face are the strongest visual anchors, and they remain visible in any weather.
Is the Jack Hall Gang treasure the same as the High Stakes treasure or the Poisonous Trail?
No. RDR2 has several independent treasure chains. The Jack Hall Gang, the High Stakes, the Poisonous Trail, and the Le Tresor Des Morts chain are all separate. They share a structure but not a story, and the rewards are different. The Jack Hall chain is the most beginner-friendly of the four.
What is the fastest route to the first dig site from Valentine?
Head north out of Valentine, follow the road past the train bridge, then take the trail that runs east toward O’Creagh’s Run. From the lake, ride to the southwestern shore and follow the stream outlet downstream. The total ride is about ten minutes at a trot.
Why does the drawing on the map not match the in-game landscape exactly?
The map is a hand-drawn prop, not a surveyed chart. The game intentionally uses silhouettes and exaggerated shapes so that the puzzle is about reading a real horizon, not following a line. The dead tree and the rock face are the two anchors that survive this stylization.
Does the Jack Hall chain affect any achievements or trophies?
Finishing the chain contributes to general open-world completion, but it does not gate any specific achievement. The reward is mainly in-game cash and the satisfaction of solving the chain. For completionists, it is one of the cleaner small objectives in the game.
How does the Jack Hall chain illustrate open-world quest pacing?
Each map is harder to read than the last, and each dig gives a small reward that funds the next trip. The chain is a textbook example of micro-progression in open-world design, and it is a useful reference for developers who are prototyping similar quest systems.


Leave a Reply