
Crimson Forest Expedition 33: where the side area fits in Act 3
Clair Obscur: Expedition 33 opens up most of its optional content once Esquie learns to fly, and the Crimson Forest is one of the side regions that only becomes reachable in Act 3. The area sits on the western edge of the overworld, marked by a large gold seal, and it is treated by the game as an optional detour rather than a required story beat. Because it is a self-contained dungeon with a mid-range level recommendation, the run usually slots between the main story push and the post-story clean-up phase of a save file.
For most players, the practical question is whether the area is worth visiting at all, given the time cost of a full flight path and a boss fight. The honest answer is that it depends on which build is active, how much Pictos progress the party has made, and whether the roster is already inside the recommended level band. This article walks through the access route, the level range to aim for, the layout inside, the boss gating the unique reward, and the cases where skipping the area is the smarter move. The framing is editorial: the goal is a route that respects the player’s time, not a checklist that demands every detour.
Where to find the Crimson Forest on the map
The Crimson Forest is positioned on the western edge of the Act 3 overworld. The clearest nearby landmark is the Endless Tower, a major late-game structure marked with a large gold seal on the world map. From the Endless Tower, the Crimson Forest lies directly north. Players who have not yet unlocked the Endless Tower can use the Forgotten Battlefield as a secondary reference point, since the forest sits to the southwest of that area.
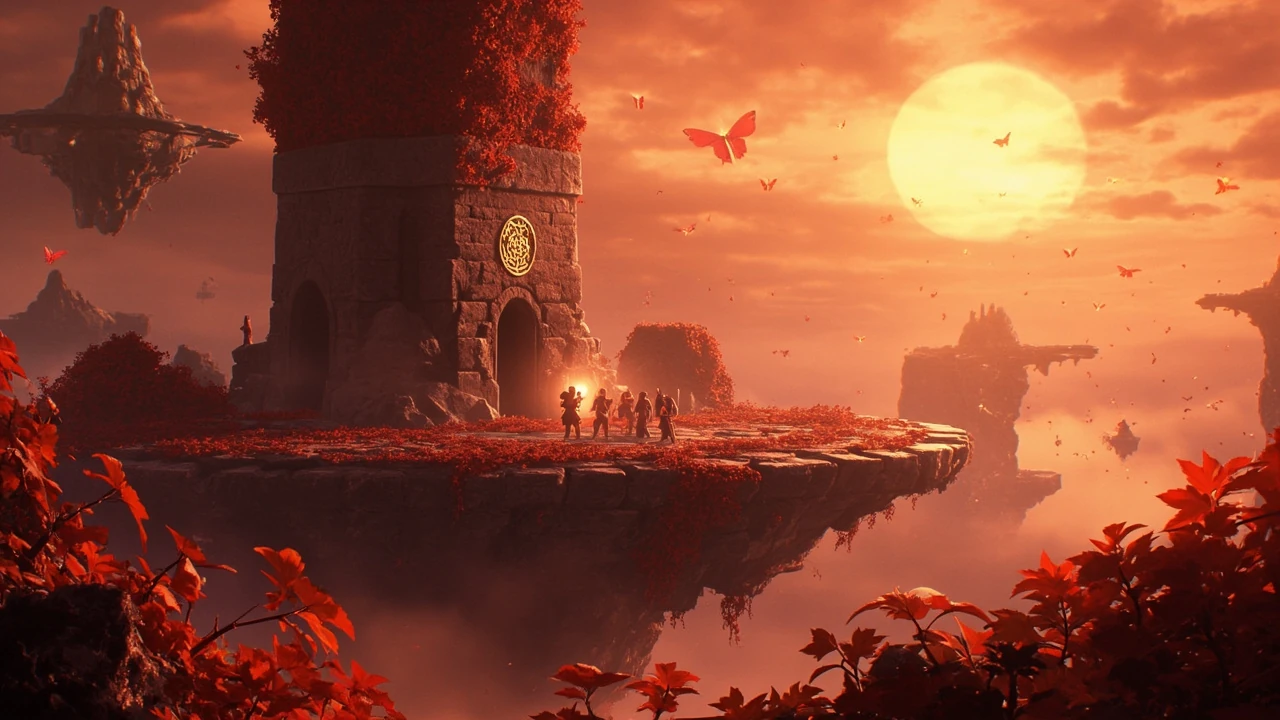
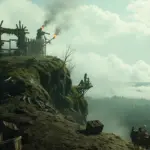
Reaching the platform requires Esquie’s flight ability, which only unlocks after a specific Act 3 story beat. Once flight is available, the forest appears as a floating stone platform composed of crimson leaves, visible from the air along the western edge of the map. The gold seal on the platform is the only real indicator that an interaction is available, and the landing zone doubles as the first Rest Point once the party is on the ground.
Three practical notes help avoid a wasted detour:
- Do not try to reach the platform by walking. The forest is only reachable by air after Esquie’s flight ability unlocks, and there is no ground path up the cliff face.
- The Forgotten Battlefield and the Endless Tower are the two reference points used by community maps. If neither is unlocked yet, fly west from the main Act 3 hub and scan the horizon for the gold seal, which is the only readable marker on the platform itself.
- Save before landing. The recommended level band is close to the late-Act 3 normal difficulty ceiling, and re-entering from a Rest Point is faster than re-flying the route if the run goes wrong.
Recommended level and party setup
The general community recommendation is to enter the Crimson Forest around level 65-70. That band lines up with the transition between late Act 3 normal enemies and the first wave of post-story optional content, and it is high enough that the random encounters inside the area will not chip the party down faster than the available healing items can recover.
There is no hard level gate, and the area is technically completable below the recommended band, but the encounter design expects players to have already invested in a few Pictos, weapon upgrades, and at least one elemental or status payoff. Coming in under-leveled usually shows up as long boss phases rather than as a failure to hit the boss at all, and the time cost of those extended phases is what pushes the recommended band upward.
A safe party setup for the run is built around three roles:
- One character with reliable single-target damage, since the boss is a sustained duel rather than a wave fight.
- One character with a cleanse or status-removal tool, because several of the regular encounters lean on debuffs and ground effects.
- One support or healer with a resource-efficient heal, since the platforming sections between Rest Points limit how often the party can stop to recover.
If the active build is missing one of these roles, the second run after a level or two of main-story progression usually clears the area comfortably, and the Pictos reward is worth banking for that second pass rather than brute-forcing the first. There is no penalty for postponing the area, and the boss does not despawn if the party enters the zone, rests, and leaves without engaging it.
Route through the Crimson Forest
The dungeon is laid out as a sequence of platforming sections connected by Rest Points, with three blade statues acting as the encounter triggers. The route below is the standard first-pass path that activates all three statues, reaches the boss, and backtracks only where the geometry of the area requires it. None of the platforming is timing-based, but several jumps have short run-up space, so a controlled approach is faster than sprinting.
First Rest Point to Crimson Perch
From the entry Rest Point, follow the main path straight ahead until the ground breaks into a small gap. Grapple across the gap using Esquie or the standard traversal tool, and the next area opens into the Crimson Perch, which has its own Rest Point marked by a flag. The grapple anchor is on the far side of the gap and is easy to miss on a first visit if the party runs past it.
Crimson Perch to the three-way split
From the Crimson Perch flag, look for a gold rope to the right of the flag. Climbing down that rope drops the party onto a field of floating pillars. Cross the pillars by jumping from one to the next, and climb the second gold rope on the far side of the field to reach the upper level. The path then splits into three directions; the middle path is the one that leads to the first blade statue, and the other two branches open up after that first encounter is cleared.
First and second blade statues
The first blade statue summons a group of Nevrons to the left of the statue. Defeat them, then look just ahead for the second blade statue. Instead of jumping the visible gap in front of the statue, drop down from the wooden ledge near the second statue to reach it. After activating it, turn right to find a short combat encounter that funnels the path back toward the Crimson Perch, and the geometry of the return path is what makes a Rest Point in the middle of the run so valuable.
Third blade statue and boss approach
From the return path, cross the floating pillars again to reach the three-way split for a second time. This time, take the left path. The third blade statue sits at the end of that branch and acts as the gateway to the boss arena, and the surrounding encounters are denser than the previous two sections. Once the third statue is cleared, the boss arena opens, and the only remaining decision is whether to push the fight immediately or return to a Rest Point to reset cooldowns.
The route, summarized:
- Entry Rest Point, grapple across the gap to the Crimson Perch.
- Climb the gold rope to the right of the Crimson Perch flag.
- Cross the floating pillars and climb the second gold rope to the three-way split.
- Take the middle path to the first blade statue, clear the Nevrons, then drop down to the second blade statue.
- Return to the three-way split via the floating pillars and take the left path to the third blade statue.
- Push through the final encounter to the boss arena.
Players who already know the route can skip the second visit to the Crimson Perch by activating the left branch directly from the upper level, but the first pass benefits from the second Rest Point, and the time saved by skipping it on a first run is small.
What the blade statues actually do
Each blade statue is a soft gate rather than a puzzle. Interacting with a statue triggers a wave of enemies tied to that part of the forest, and clearing the wave is the only way to progress past that branch. There is no alternate solution, and the statues do not lock after activation, so revisiting a branch to farm the associated encounter is possible from any later Rest Point. The statues are also the only objects in the area that respawn after a Rest, which makes them the most reliable source of repeatable standard drops inside the dungeon.
The reason the statues matter is encounter density. The three branches have noticeably different enemy mixes, and which blade statue is cleared first changes how much chip damage the party takes on the way to the boss. The middle path tends to be the safest opener because the Nevron wave is smaller and the platforming is shorter. The left path, which leads to the boss, has the densest mix of ranged and melee enemies, and is usually approached last so that the party is not paying for those encounters twice.
Boss fight overview and rewards
The boss guarding the Crimson Forest is a single, tougher encounter rather than a wave fight, and it is the reason the area is recommended for level 65-70 players. The encounter is designed around sustained damage windows and a small number of hard telegraphs, so the fight rewards a build that can output consistent damage across a long phase rather than burst windows. The arena is a single circular platform with no Rest Point access once the fight starts, so the only meaningful preparation is what the party brings into the room.
Three observations show up consistently in player reports of the encounter:
- Phase transitions are signaled by a full arena visual change, and a defensive cooldown or a cleanse should be queued for the moment the transition animation ends.
- Ground-targeted area-of-effect attacks cover the center of the arena, and the safe zones are usually along the edges or behind the boss during the wind-up.
- The boss is weak to status effects that interrupt its cast bar, and a Pictos that grants a small chance to interrupt on hit noticeably shortens the fight.
The unique reward for clearing the boss is a Pictos, which is the side content’s real draw. Pictos are a long-term progression resource, and the Crimson Forest version is one of the mid-tier unique picks that is worth slotting even on builds that do not specialize in its associated archetype. The exact effect text should be read in-game after the drop, since balance changes between patches have shifted the wording on similar rewards in other side areas.
Why the Pictos reward matters for mid-game builds
Pictos in Expedition 33 act as a secondary layer of stat and effect tuning, and they are the main way to push a build past the soft caps that the main story provides. A Pictos that drops from a side area like the Crimson Forest is usually tuned to reward a specific play pattern, and slotting it well can shift a build from a comfortable clear into a noticeably faster one. The downside is that the effect is rarely self-explanatory, and a Pictos that looks strong on paper can underperform if the carrier does not match the trigger condition.
For a build that is still in transition between Act 2 and Act 3, three Pictos uses are worth keeping in mind:
- Slot the Crimson Forest Pictos onto the character that triggers the most interactions per turn. Passive Pictos effects scale with action economy, and the wrong carrier can hide the bonus.
- Pair the Pictos with a second Pictos from a different area that compensates for its weakness, rather than stacking two effects in the same archetype.
- Respec around the Pictos only after a full clear, not before. The first run is the best source of information about how the new effect actually plays in combat, and a premature respec can lock the build into a direction that the reward does not support.
The same logic applies to the next few Pictos drops. Treating each unique drop as a slot to test rather than a slot to commit to keeps the build flexible through the Act 3 clean-up phase, and the Crimson Forest reward is a useful test case because its trigger condition is mid-complexity.
Common failure modes and how to avoid them
Most Crimson Forest runs that go wrong do so for one of three reasons. The first is entering under-leveled, which shows up as long boss phases and a steady drain on healing items. The second is missing the second blade statue, which forces a backtrack through an enemy-dense section of the area. The third is saving the healing cooldowns for the boss instead of spending them on the third blade statue branch, which leaves the boss arena under-resourced.
A simple pre-flight checklist handles most of these failure modes:
- Confirm the party is inside the 65-70 level band, or within two levels of it.
- Rest at the Crimson Perch after clearing the first blade statue, even if the run is going well.
- Use a healing cooldown on the third blade statue branch, and treat the boss as a second encounter that should start with full resources.
- Save before the boss arena. The boss is the most likely source of a restart, and the run-up to the arena is short enough that re-entering is cheap.
One additional failure mode worth flagging is over-reliance on the gold seal as a navigation cue. The seal is large and easy to read from the air, but once the party is on the ground, the seal is no longer visible from inside the platforming sections, and a missed turn at the three-way split can send the party back to a Rest Point they did not intend to revisit.
When to skip the Crimson Forest
Skipping the area is a reasonable call in three cases. The first is when the active party is below level 60, since the encounter design will out-scale the party’s damage output faster than the healing items can compensate. The second is when the build is still missing a core damage dealer or healer, since the boss assumes at least one of each role and a half-built party will have a much harder time than the level number suggests. The third is when the player is closer to the end of Act 3 than to the post-story clean-up phase, since the Pictos reward is more useful after the main story is finished and the build has a stable direction.
Returning to the area after finishing the main story is also valid, and the encounter does not scale up significantly past its initial level band, so a post-game party can clear the boss comfortably and bank the Pictos as a late-game optimization. The gold seal on the platform remains visible from the air in the post-game state, so navigation does not get harder after the main story is complete.
How the Crimson Forest compares with other Act 3 side areas
Act 3 opens up several optional regions, and the Crimson Forest is one of three or four mid-difficulty side areas that share a similar level band. Comparing the area with its peers is useful for planning the clean-up phase of a save file, since the order in which the side regions are cleared affects how much healing and Pictos resource the party has at any given moment. The comparison is also a way to avoid the common mistake of treating every side area as equivalent, because the time and resource cost of each is different.
| Side area | Recommended level | Main reward | Boss type | Time to clear |
|---|---|---|---|---|
| Crimson Forest | 65-70 | Unique Pictos | Single sustained duel | Short to medium |
| Forgotten Battlefield | 60-65 | Weapon upgrade material | Wave-based encounter | Medium |
| Endless Tower approach | 70+ | Late-game gear | Multi-phase boss | Long |
| Western overworld ruins | 60-70 | Standard Pictos pool | Mini-boss gauntlet | Short |
The Crimson Forest sits between the Forgotten Battlefield and the Endless Tower in difficulty, and the practical order is usually Forgotten Battlefield first, then the Crimson Forest, then the Endless Tower approach. That order lets the party build up a Pictos pool and a weapon upgrade from the first two areas before taking on the longer multi-phase encounter at the tower. Players who are already over-leveled for the Crimson Forest can skip ahead, but the order still holds as a default plan for a first save file.
Planning a clean-up run that includes the Crimson Forest
For players who want a structured pass through the Act 3 side content, the Crimson Forest fits cleanly into a three-stop clean-up loop. The loop is built around the Endless Tower as the late anchor, the Forgotten Battlefield as the early anchor, and the Crimson Forest as the mid-band area that bridges them. The loop also doubles as a checklist for the post-game clean-up phase, since the same three areas are still worth clearing after the main story is finished.
| Stop | Order | Why it goes here |
|---|---|---|
| Forgotten Battlefield | First | Lowest level band of the three, gives the party a weapon upgrade and a Pictos pool to build on. |
| Crimson Forest | Second | Mid-band level, the Pictos reward is more useful once the build has a direction from the first stop. |
| Endless Tower approach | Third | Highest level band, the long multi-phase boss is easier with two side areas already cleared behind it. |
This order is not mandatory, and players who are already over-leveled for the Crimson Forest can clear the area at any point in the Act 3 sequence. The point of the loop is that the three areas share healing, Pictos, and gear resources, and clearing them in difficulty order avoids the case where the hardest area is attempted first on a half-prepared party. The loop also produces a small but useful side effect: the route between the three areas is short enough that a clean-up run is a single sitting rather than three separate trips.
What to do after clearing the Crimson Forest
After the boss is down, the practical next steps depend on the active build. For a Pictos-hungry build, the next step is usually a quick pass through a different Act 3 side area to round out the effect pool before slotting the Crimson Forest reward. For a build that is closer to the main story, the next step is to bank the Pictos and return to the story push, since the side area’s value is highest when the build is finished, not while it is still in flux.
Three follow-up actions are worth queueing immediately after the boss fight:
- Slot the new Pictos onto the appropriate character and re-test a few standard encounters to confirm the effect triggers as expected.
- Note the route in the journal or a personal checklist, since the area becomes a clean-up target on a second pass and a saved route saves time.
- Check the rest of the Act 3 side area list, since the Crimson Forest is one of several Pictos sources and a coordinated pass through the others is more efficient than a single-area run.
For players who plan a second save file, the Crimson Forest is also a useful benchmark for how the build has progressed. A clear that takes one attempt on the second file is a signal that the build has reached the late-Act 3 soft cap, and a clear that still requires two or three attempts is a signal that the build needs another pass through the side areas before the main story push.
Practical framing: how the run actually feels
It is worth being honest about the texture of the run, since a lot of side-area guides describe the path without describing the experience. The Crimson Forest is short, dense, and visually striking in a way that the surrounding Act 3 overworld is not. The crimson leaves on the platform are the first clear color cue in that part of the map, and the gold seal reads from a long distance, which makes the area easy to navigate once the party is in the air.
The platforming is forgiving. None of the jumps require frame-perfect input, and the floating pillars near the Crimson Perch are spaced for a controlled run rather than a sprint. The encounters, on the other hand, are tuned tightly, and the chip damage from the third blade statue branch is the most common reason a run ends with the party under-resourced for the boss. Players who are used to the slower pace of the main story should expect the side area to feel a step faster, and that pace is the reason the recommended level band is closer to the late-Act 3 ceiling than the midpoint.
The boss is a tone shift. The arena is quiet before the fight starts, and the visual change on the phase transition is the loudest moment in the run. The Pictos drop is the payoff, and the description text is worth reading in full before slotting, because the trigger condition is the part that is most often misunderstood by players who are skimming the reward screen between encounters.
Frequently asked questions
What level should I be for the Crimson Forest in Expedition 33?
The general community recommendation is to enter around level 65-70. The area has no hard level gate, but the encounter design expects the party to be in that band, and going in under-leveled usually shows up as long boss phases and a steady drain on healing items rather than as a hard lock.
How do I reach the Crimson Forest in the first place?
The Crimson Forest is on the western edge of the Act 3 overworld and is only reachable by air. The area becomes accessible after Esquie gains the ability to fly, and the entry point is a floating platform of crimson leaves marked with a gold seal. The Endless Tower to the south and the Forgotten Battlefield to the northeast are the two most common reference points used to locate it.
Is the Crimson Forest a required story area?
No. The Crimson Forest is an optional side area, and the main story can be completed without ever entering it. The area is intended as a mid-to-late Act 3 detour that rewards players who want a unique Pictos and a boss fight outside the main quest line.
What is the reward for clearing the Crimson Forest boss?
The boss drops a unique Pictos, which is the main reason most players clear the area. The exact Pictos effect changes with patches, so checking the in-game description after the drop is more reliable than relying on a written summary of the effect.
Can I clear the Crimson Forest under level 65?
It is technically possible, but the encounter design assumes a level 65-70 party, and the boss fight is the most likely place for an under-leveled run to fail. If the active party is below 65, it is usually faster to push one or two more main story beats and return at a higher level than to grind the side area under-leveled.
Do the blade statues respawn after I clear them?
The statues do not lock after activation, so the associated encounters can be revisited from a later Rest Point. This is useful for farming the standard enemy drops tied to each branch, but the unique Pictos is a one-time reward from the boss and does not re-roll.
Is the Crimson Forest worth the time on a second playthrough?
Yes, especially on a build that is making use of a Pictos-heavy playstyle. The area is short enough to clear in a single sitting, and the unique Pictos is one of the mid-tier rewards that scales well with a finished build. On a first playthrough where the build is still in flux, banking the area for a second pass is a reasonable choice.
What should I do if I keep dying to the boss?
The most common fix is to spend healing cooldowns earlier in the run, particularly on the third blade statue branch, and to enter the boss arena with full resources. If the party is at the recommended level and the boss still feels punishing, the next step is usually a small Pictos or weapon upgrade from one of the other Act 3 side areas before returning.
Does the Crimson Forest scale with the main story progression?
The encounter level does not scale up significantly past the recommended band, and the area is not gated by story beat beyond the Esquie flight unlock. This makes the Crimson Forest a stable clean-up target on a finished save file, and a reasonable area to revisit for a Pictos farm even after the main story is complete.
How long does a full Crimson Forest run take?
A clean first pass usually takes between twenty and forty minutes depending on how much exploration the party does, and a second-pass clear with a known route is closer to fifteen to twenty. The boss is the largest single time cost in the run, and a one-attempt clear is more time-efficient than grinding outside the area before entering.


Leave a Reply