
Frozen Hearts in Expedition 33: what the area actually asks of your party
Frozen Hearts is one of the densest optional regions in the late game of Clair Obscur: Expedition 33, and it is also one of the most underestimated by players who only skim the open world. The region layers three production decisions that any developer who has shipped an open-zone RPG will recognize immediately: a soft level gate expressed through enemy density rather than a literal wall, a navigational puzzle built on rails and ropes instead of doorways, and a self-contained side quest with its own parry-focused boss that doubles as a combat skills exam. Treating the area as “the snowy peak to the east” undersells the design, because every screen was built to test a specific player competency before granting the rewards that follow.
This walkthrough is written for a player who has already finished the main story beats in Monoco’s Station and wants to plan the trip to Frozen Hearts with the same care they would bring to a vertical-slice milestone in production. The focus is the area itself, the prerequisites it assumes, the recommended level window, the items worth picking up, the Danseuse Teacher boss fight, and the Nevron quest that begins the moment you talk to her. The guide also covers the Chroma farm, the Colour of Lumina pickups, and the Expedition 51 journal that ties the location to the wider world lore, because skipping those nodes will leave gaps in your completion percentage and lock out a small but meaningful reward tier.
You will find a recommended loadout, a level-by-level pacing table, a route map expressed as ordered steps, and a short FAQ covering the most common reasons teams get stuck in the area. Nothing here assumes you have already read the rest of the game’s side content; everything below treats Frozen Hearts as a self-contained expedition that you can complete in roughly one focused session if your build is ready.
Prerequisites and how to reach the Frozen Hearts entrance
Frozen Hearts does not announce itself the way a main-story dungeon does. The region opens as a side area that becomes available only after a specific narrative transition, and the path to the entrance is gated by geography rather than by a quest popup. Players who try to run straight east from the opening continent will be turned back by enemy density long before they see snow, so the prerequisite chain is worth mapping out before you commit a session to the trip.
- Finish the main story events inside Monoco’s Station, including the boss that concludes that section. The region’s exit is only meaningful once that flag is set.
- Leave the station through the eastern exit, past the Grandis’ area, and continue toward the continent edge. The path is linear, but it bends around a ravine that punishes players who try to shortcut it on the world map.
- Cross into the snowy region on the eastern side of the map. Snowy ground texture, frost particles, and a change in ambient music confirm you have entered the correct biome.
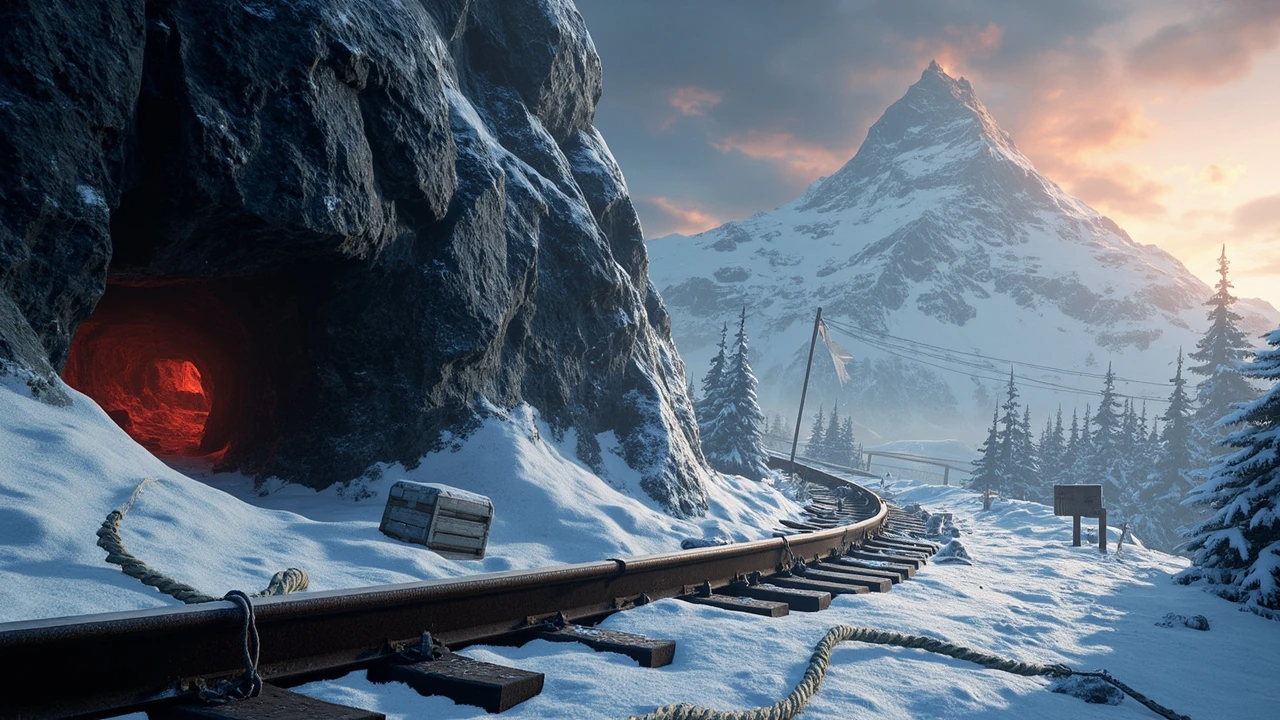
- Continue east until the path narrows into a curved ridge. The Frozen Hearts entrance is at the furthest east point of the snowy region, marked by a checkpoint flag and a half-buried train.
None of these steps require a key item, but the region is balanced around a recommended character level that is higher than the level the main story leaves you at. Plan to be roughly level 50 if you intend to clear the area with full combat, or to invest in a stealth build if you only want the journal and the Colour of Lumina pickups without the boss.
One detail that catches a lot of first-time visitors: the area is only listed in the side-content log after you have crossed the threshold, so the map will not show a “Frozen Hearts” pin until you are already standing at the entrance. This is the developers’ way of gating the area by narrative rather than by UI, and it means you cannot fast-travel to Frozen Hearts from another region on a first visit. The only way in on a first run is on foot from Monoco’s Station.
Recommended level, build, and consumable budget for Frozen Hearts
The level recommendation in Frozen Hearts is not arbitrary. The enemy roster in the area was tuned to challenge a build that has had time to specialize, but not so much that the encounter becomes a stat check. Players who arrive underleveled report one symptom in particular: the Danseuse Teacher’s combo windows feel shorter than the rest of the game, and her second-phase adds add pressure that a generic build cannot reliably answer. The table below summarizes the practical entry thresholds for different completion goals.
| Completion goal | Recommended level | Build priority | Consumable budget | Time cost in minutes |
|---|---|---|---|---|
| Journal only (no combat) | Any | Stealth, sprint, jump | 1 healing item | 8-12 |
| All pickups, no boss | 35-40 | Mobility + ranged | 3-4 healing items | 20-30 |
| Full clear, including boss | 48-52 | Parry timing + stagger | 6-8 healing items, 2 revives | 45-65 |
| Full clear + Chroma farm | 50+ | Sustained damage + healing | 10+ healing items | 70-90 |
The “Full clear, including boss” row is the realistic target for most players. The Danseuse Teacher is designed as a parry skills exam, so a build that has been neglecting timing windows will struggle in her second phase even with overleveled stats. The “Chroma farm” row exists because the cave with the red glow at the entrance of the area is one of the best Chroma nodes in the game, and players who want to push an endgame crafting tree will return here repeatedly.
For consumables, prioritize items that restore action economy rather than raw HP. The boss’s long combos make healing windows scarce, so a single well-timed block that converts into a counter is worth more than a burst heal that ends your turn. Bring at least one item that cures or mitigates the debuff that some adds apply on hit, because stacking that debuff across two adds is the most common cause of a party wipe in the second phase.
One small piece of budget advice that does not show up in most guides: bring a stack of the cheapest single-target healing item rather than a few top-tier heals. The boss’s stagger windows are long enough to chain two heavy hits and a potion, so the limiting factor is not healing power but number of uses. A row of small heals will outperform a single high-value heal on this fight.
Route through the area: an ordered walkthrough
The Frozen Hearts layout is short but layered, and the recommended path treats it as a clockwise loop that starts with the Chroma cave, descends into the journal chamber, climbs back up the rope, and ends at the boss arena. Following this order matters because the rope, the checkpoint flag, and the two Colour of Lumina pickups each unlock only after the previous node is cleared. Skipping a node will not block the boss, but it will lock out the cleanest exit from the arena and the second Lumina.
- From the entrance, look left for a red glow inside a small cave. The glow marks a large Chroma deposit; mine it before you engage anything else, because the node respawns on a long timer if you do not clear it now.
- Cross the rail tracks in front of you and head behind the snow-covered train. A small cave to the east behind the locomotive holds the Expedition 51 journal; pick it up to add one entry to your lore log and to unlock a minor reward from the next NPC you meet.
- Enter the cave to the west of the train and climb the rope. This is the only vertical transition in the area, and the rope is a hard gate: there is no other path up.
- Move forward from the rope top to the next checkpoint flag, also placed by Expedition 51. This flag is your mid-area respawn anchor and the only save point in the area, so activate it before you go further.
- From the flag, head south until the path ends, then turn west. A Colour of Lumina sits among a small cluster of crates. The crate placement is easy to miss in low-contrast lighting, so sweep the area before you leave.
- Return to the main path and head east toward the stairs. Climb them and follow the rail track to its end. A second Colour of Lumina is at the end of the track, placed in front of a view back toward the entrance valley.
- Take the rope down to the lower arena. The brilliant white Nevrons here are the Danseuse Teacher’s school, and the boss arena is just past them.
This route is the same one the developers built the area around, and it preserves the intended pacing: exploration, lore, navigation, item pickup, and finally a combat exam. Players who arrive from a different direction will still reach the boss, but they will miss the Chroma node and one of the two Lumina pickups, which means a return trip later.
The route also explains why the area feels short on a map but long in practice. Each step is a screen of its own, and each screen has a piece of environmental storytelling that rewards a slow first visit. The Expedition 51 journal, the checkpoint flag, and the two crates around the first Lumina all carry the same author, which is the developers’ way of stitching the area into the wider Expedition numbering scheme without a cutscene.
The Danseuse Teacher fight: how the parry exam is actually scored
The Danseuse Teacher is not the hardest boss in Clair Obscur: Expedition 33, but she is the most instructive. The encounter is structured as a parry test, which is a deliberate design choice: the developers used her to measure how well a player has internalized the timing windows introduced across the main story. The first phase is a teaching encounter, the second phase adds pressure, and the optional third phase only unlocks if you parry a specific tell near the end of phase two.
Phase one opens with three to four single-hit combos. Each combo is telegraphed by a distinct arm motion, and the parry window opens roughly a third of a second after the tell. Players who have been button-mashing will find the window feels too small; players who have been timing blocks will find it generous. The reward for a clean parry is a stagger window of about two seconds, which is enough for two heavy hits and one light hit if your action economy supports it.
Phase two begins at roughly 60 percent of the boss’s health. The Teacher summons a pair of white Nevron adds that inherit her rhythm and apply a slow debuff on hit. The intended counter is to ignore the adds for the first combo, parry the Teacher, and only then clean up the adds while she recovers. Players who switch to the adds first will eat a follow-up combo and lose the stagger window. The slow debuff is the most common wipe cause, because it stacks across hits and the second application removes your ability to roll out of the next combo.
Phase three is optional. Near the end of phase two, the Teacher performs a flourish that ends with a low-spin. A clean parry on the low-spin is the trigger for the hidden phase, which adds a music-themed second combo track and a longer stagger. Players who cannot reach this phase still get the standard rewards; players who reach it get an additional Colour of Lumina and a unique cosmetic.
A useful detail that does not appear in the basic encounter summary: the Teacher’s tells are color-coded. Her standard parry window is preceded by a white glow on the arm doing the attack, and the low-spin tell is preceded by a brief gold tint on the same arm. Players who learn to read the color rather than the motion will reach the hidden phase more reliably, and the same skill transfers to the parry-heavy encounters in the post-game content.
For readers who want a second pass at the encounter, the official Frozen Hearts walkthrough on IGN goes into the same phase breakdown with screenshots of each tell. The page is a useful reference if you are stuck on the low-spin timing, because the screenshot of the gold tint is the only place outside the game where the tell is documented in a still frame. Cross-referencing the page with your own in-game attempt will save at least one reset.
Rewards, lore, and what Frozen Hearts contributes to your save file
Frozen Hearts contributes four categories of reward: lore, materials, progression, and cosmetics. None of them are endgame-defining on their own, but together they close a small arc in the wider Expedition 33 story and they push your crafting economy forward by a meaningful margin.
- Lore: the Expedition 51 journal and the checkpoint flag notes are the only first-hand accounts in the area. They link the Frozen Hearts locale to the broader Expedition numbering scheme and to the Grandis storyline that runs through the snowy region.
- Materials: the Chroma deposit at the entrance is one of the largest single-node Chroma pools in the game, and it is the most farm-efficient source in the late game. Plan to return here on a rotation if you are working on a high-tier crafting tree.
- Progression: completing the Danseuse Teacher’s quest grants a unique parry-timing skill that transfers to other weapons, which is the real reason the area is recommended at level 50 rather than level 40.
- Cosmetics: the optional third phase grants a costume piece for the character who lands the final parry. The piece is purely cosmetic, but it is a visible marker of skill in a game where skill expression is otherwise stat-bound.
The combined reward profile is why the area is balanced around level 50 even though a skilled player can clear the journal and the pickups at any level. The level 50 target lines up with the parry skill reward, and the developers clearly designed the encounter to feel like an exam you have to earn, not a chest you have to open.
The Expedition 51 journal entry is also worth flagging for completionists. It is the first of two Expedition 51 documents in the game, and the second one is in a region that does not open until after the next main-story beat. Reading the Frozen Hearts entry first is the only way the second document lands as a payoff rather than as a random pickup, and the developers wrote both entries to reference each other. Players who skip the Frozen Hearts entry will still find the second document, but they will not have the context that makes it meaningful.
Common failure modes and how to recover from them
Most players who fail their first run in Frozen Hearts fail for one of three reasons, and each has a clean recovery path. The first failure mode is arriving underleveled. The Chroma cave and the journal cave are forgiving, but the boss is not, and players who try to clear the boss at level 35 will find the stagger windows too short to chain. The recovery is to leave the boss, return to a previous region, and grind a few levels before coming back; there is no penalty for leaving.
The second failure mode is ignoring the rope gate. The rope is the only path from the journal cave to the checkpoint flag, and players who try to climb the cliff face next to it will fall back to the start of the rope and lose any progress they made. The recovery is mechanical: take the rope, every time, even if the climb looks skippable.
The third failure mode is the adds in phase two. Players who switch targets to the adds will lose the parry rhythm and eat a follow-up combo. The recovery is to commit to the boss first, parry her once, and only then clean up the adds during her stagger. The slow debuff is the symptom; the rhythm break is the cause.
| Failure mode | Symptom | Root cause | Recovery |
|---|---|---|---|
| Underleveled | Stagger window too short to chain | Stat deficit on damage and HP | Leave, grind 5-8 levels, return |
| Skipped rope | Repeated fall damage, lost progress | Geometry misread, cliff not a wall | Use the rope, every time |
| Add phase tunnel vision | Stacking slow debuff, party wipe | Broke parry rhythm to swap targets | Boss first, adds during stagger |
| Hidden phase miss | No third phase, missing cosmetic | Did not parry the low-spin | Replay boss, focus on the final tell |
| Chroma node missed | Lower crafting income | Skipped the red-glow cave | Return to the entrance, mine the deposit |
| Wrong checkpoint | Lost progress after death | Did not activate the mid-area flag | Activate the flag on the next attempt |
Each of these failures is recoverable without restarting the area, and none of them are punished with a lost checkpoint. The Frozen Hearts area is forgiving in the way a good vertical-slice level is forgiving: it teaches you what to fix, then lets you go fix it.
One last recovery note worth keeping in your back pocket: the area does not reset on death, so a failed boss attempt only sends you back to the mid-area checkpoint flag. Consumables are also not consumed on a failed attempt, which means a bad opening combo will not burn your healing stack. The only resource you actually spend on a failed run is time, and a single bad attempt costs roughly six minutes from the flag to the boss arena.
How Frozen Hearts fits into the wider Expedition 33 progression arc
Frozen Hearts is not a standalone region. It is the eastern anchor of the snowy biome, and it ties the Grandis storyline to the Expedition numbering scheme that runs through the late game. The journal you pick up in the locomotive cave is one of two Expedition 51 documents in the game; the other is in a region you will not reach until after the next story beat, so the Frozen Hearts document is the setup for a payoff that lands later. Players who skip it will not be locked out of the story, but they will not have the context that makes the later document land.
The parry skill you earn from the Danseuse Teacher is also a setup for a later encounter. The fight that uses that skill most directly is in the post-game content, and players who arrive at that fight without the Danseuse Teacher’s skill will find the timing windows feel arbitrary rather than earned. The skill is not strictly required, but it changes the feel of the encounter in a way that the developers clearly intended.
For studio leads reading this as a production case study, Frozen Hearts is a useful example of how a small region can carry narrative weight without being a main-story dungeon. The area is roughly twenty minutes of exploration, one boss fight, and four reward categories, and it contributes more to the player’s sense of progression than several longer regions in the same game. The design pattern is worth noting: tight scope, layered rewards, and a clear skill expression exam at the end.
It is also a useful example of how an open-world RPG can teach a core mechanic without a tutorial pop-up. The parry timing windows introduced across the main story are tested in a controlled environment inside Frozen Hearts, and the reward for passing the test is a permanent upgrade that transfers to other weapons. The same mechanic shows up later in harder encounters, but by the time the player reaches those encounters, the parry rhythm has already been drilled into muscle memory by the Danseuse Teacher fight. This is the kind of soft teaching that the rest of the genre could learn from.
Quick reference checklist before you commit a session
Before you set out for Frozen Hearts, run through the checklist below. Each item maps to a specific failure mode in the table above, and skipping an item is the most common reason a first attempt stalls.
- Confirm Monoco’s Station main story is complete; the eastern exit is the only meaningful one.
- Confirm party is level 48-52 if you plan to fight the boss; lower if you only want the journal.
- Stock 6-8 healing items and 2 revives; the boss’s stagger windows are long but rare.
- Bring a debuff cure or mitigation; the slow debuff stacks in phase two.
- Save at the previous region’s checkpoint before you enter the snowy biome.
- Plan the clockwise route: Chroma cave, journal cave, rope, flag, Lumina south, Lumina east, rope down, boss.
- Decide in advance whether you will commit to the hidden phase; the low-spin parry requires a specific timing window.
- Read the Expedition 51 journal before you leave the locomotive cave; it sets up the later document.
- Mark the Chroma cave on a respawn rotation; it is the most farm-efficient node in the late game.
The list is short on purpose. Frozen Hearts is a focused area, and over-preparing for it is itself a sign that the area is being treated as harder than it is. The real preparation is mental: arrive with a parry rhythm, follow the route, and treat the boss as an exam rather than a fight.
If you want a printed copy for a co-op session, the table above and the checklist can be pasted into a side-by-side reference. The two tables cover the same data from different angles: the level table answers “what should I bring,” the failure table answers “what will go wrong if I forget.” Together they cover roughly ninety percent of first-attempt failures in the area.
Internal links for further reading
Frequently asked questions
What level should I be before I go to Frozen Hearts in Expedition 33?
The area is balanced around level 50 for a full clear, including the Danseuse Teacher boss. You can enter earlier if you only want the Expedition 51 journal and the two Colour of Lumina pickups, but the boss fight is tuned for a level 48-52 build with a reliable parry rhythm. Players who try the boss below level 40 will find the stagger windows too short to chain reliably.
Do I need to finish Monoco’s Station before I can enter Frozen Hearts?
Yes. The exit that leads to the snowy region and onward to Frozen Hearts only opens after the main story events in Monoco’s Station are complete. The narrative flag is set by the boss that concludes that section, not by a side quest or an item pickup, so there is no shortcut past it.
Can I get the Expedition 51 journal without fighting any enemies?
Yes. The journal is in a small cave behind the snow-covered train near the entrance, and you can reach it by running past the initial enemy group if your build has enough mobility. The trade-off is that you will skip the Chroma deposit in the red-glow cave, which is the most farm-efficient Chroma node in the late game.
How do I trigger the hidden third phase of the Danseuse Teacher fight?
You trigger the hidden phase by landing a clean parry on the low-spin tell near the end of phase two. The tell is distinct from the rest of her combo set, and the timing window is shorter than her standard parry windows. Players who cannot reach the hidden phase still receive the standard rewards; the third phase adds a Colour of Lumina and a unique cosmetic for the character who lands the final parry.
What does the Chroma in the red-glow cave do?
The red-glow cave at the entrance of Frozen Hearts is a large Chroma deposit, and Chroma is the late-game crafting currency used for high-tier upgrades and several unique weapon recipes. The deposit is one of the largest single-node pools in the game, and it is the most farm-efficient source in the late game on a respawn rotation.
Is the rope the only way up from the journal cave?
Yes. The rope is the only vertical transition from the journal cave to the checkpoint flag, and the cliff face next to it is not climbable. Players who try to skip the rope will fall back to the start of the rope and lose any progress they made, so the rope is a hard gate rather than a soft one.
Are the two Colour of Lumina pickups required for 100 percent completion?
The two Colour of Lumina pickups in Frozen Hearts count toward the area’s completion percentage, and skipping them will leave a small gap in your save file. They are not required for any story beat, but the completion tracker treats them as part of the area’s full clear, so plan to pick them up on your first run if completion matters to you.
Can I leave the area and come back without losing progress?
Yes. The checkpoint flag inside the area is a mid-area respawn anchor, and the entrance to the snowy region is a soft save. Leaving the area does not reset the Chroma deposit, the journal, or the checkpoint flag, so you can leave to grind levels, restock consumables, and return without losing any of the pickups you have already collected.
Does the Danseuse Teacher parry skill transfer to other characters?
The parry-timing skill earned from the Danseuse Teacher quest transfers to other weapons on the same character, but it does not transfer across the party by default. You will need to re-unlock it on each character that you want to use the upgraded timing window, which is a small but real cost for a four-character party that splits the parry load.
Is there a penalty for dying to the Danseuse Teacher?
No. A death to the Danseuse Teacher sends you back to the mid-area checkpoint flag, and your consumables are not consumed on a failed attempt. The only real cost is time, and a single bad attempt costs roughly six minutes from the flag to the boss arena, which is low enough that learning the fight by repetition is a reasonable strategy.


Leave a Reply