

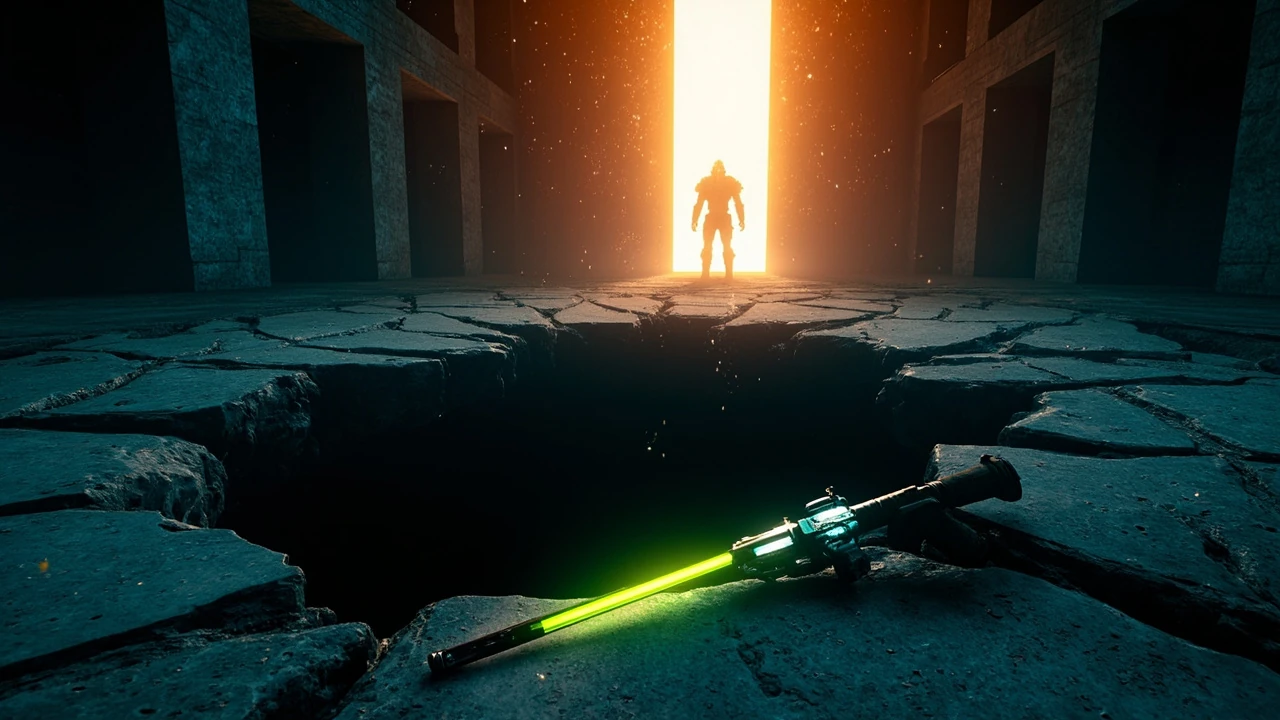
Idolator Sol drops in Borderlands 4: the encounter, the armor strip, and what the fight actually teaches
The first time a player reaches the end of the Rush the Gate main mission in Borderlands 4, the game stops behaving like a standard Borderlands loot run. Idolator Sol is the second major boss of the campaign and the first of the Timekeeper’s commanders met on Kairos, and his encounter is built around a single hard rule: the player cannot damage him until the system around them changes. That design choice has a direct effect on what idolator sol drops actually mean in the early economy, because the loot table is only accessible after the player solves a specific combat puzzle. The official Borderlands 4 wiki treatment of the fight treats it as both a walkthrough and a drop reference, which is a useful signal for how the encounter is meant to be learned: pattern first, reward second.
For a player trying to plan their first hours on Kairos, the interesting question is not “is the loot good” but “how does the encounter gate the loot, and what does that tell me about the later commander fights?” The article below walks through the encounter design, the mechanics that gate idolator sol drops, the loot philosophy Borderlands 4 is signaling here, and the production lessons a designer can draw from a boss that hides its reward behind a small combat puzzle. There is also a checklist at the end for players who want a tighter first clear, and a short FAQ that covers the questions that tend to come up once the Encore machine is unlocked.
Where the fight sits inside Borderlands 4’s structure
Idolator Sol appears at the end of Fortress Indomita, in the Idolator’s Noose region of The Fadefields, immediately after the Rush the Gate mission wraps. Two structural facts matter before the loot table is even relevant.
- He is a campaign anchor, not a side boss. He is one of the named commanders of the Timekeeper faction, and players cannot skip him in the story path.
- He is the first commander who tests whether players have learned to read multi-phase encounters. Later commanders build on the same armor-stripping idea, but with more layers and additional adds.
That placement is important for understanding his drops. In Borderlands tradition, a mid-campaign commander is rarely the best farm in the game. The loot is meant to be good enough to feel rewarding, with at least one piece that solves a problem for the player’s current build, but not so strong that it trivializes the next four acts. Idolator sol drops follow that logic. The reward validates the puzzle, rather than rewarding raw damage output, and that is the standard the rest of the commander arc will quietly inherit from this first fight.
It is also worth noting that the Idolator’s Noose region itself is built to prepare the player for the fight. The fortress interior is a tight, linear space with reinforced doors that already use the same bio-armor plating the boss wears, and the Bio-Bulkhead mini-boss from the One Fell Swoop mission introduced the locust rod interaction in a smaller arena. By the time the player drops into Idolator Sol’s chamber, they have already seen the visual language twice. The fight is the third time the game asks the player to do the same thing, only now the armor is on a moving target with a real attack pattern, and the stakes of failing the loop are the entire drop table. That kind of repetition is not laziness on the level design side; it is a deliberate ramp.
The encounter gate that hides idolator sol drops
The fight opens with Idolator Sol coated in bio-armor, the same plating that players have already seen on reinforced doors in the level and on the Bio-Bulkhead mini-boss during the One Fell Swoop mission. The armor absorbs incoming damage and only the locust bio-weapon breaks it down. The combat loop looks like this:
- Wait for Idolator Sol to fire his locust rod attack, which launches a line of red rods plus a single green rod into the ground.
- Use the grapple to pull the green rod out of the ground.
- Throw the green rod back at Idolator Sol to strip the bio-armor.
- Damage the three flesh health bars that appear underneath, which are weak to Incendiary and fire damage.
- Survive until the next locust rod phase, repeat the loop, and finish the encounter.
The drop table is hidden behind that loop. If a player ignores the green rod and tries to brute-force the bio-armor, the fight stalls and idolator sol drops never appear. The encounter is designed so the reward is conditional on the player learning one specific interaction, which is a classic Borderlands 4 trick: turn a single tutorial into a farm condition. The green rod is the only object in the arena with that color, and the visual contrast is deliberate, so the player does not have to guess which projectile to grab. The red rods are also there for a reason, because they teach the player to read color as a mechanic before the green one even fires.
For a developer, the production point is that the encounter is a small state machine. The boss has a normal attack pattern, a transition attack that creates a usable projectile, an interaction that consumes the projectile, and a vulnerable state. The player’s reward depends on entering the vulnerable state at least once, which means loot tables are keyed to a flag rather than to raw damage. That separation is what makes idolator sol drops feel intentional rather than incidental, and it is also why balance patches for the fight only need to retune one boolean rather than re-authoring damage numbers. If the studio ever wants the fight to feel harder without touching the loot, they can shorten the rod cycle. If they want it to feel easier, they can extend it. The drop table does not have to move with either change.
There is also a quiet audio cue that is worth flagging. The green rod has a different impact sound from the red rods, and that audio contrast is the player’s last fallback if the visual contrast ever gets lost in a busy arena. Together, the color and the sound make the gate mechanic accessible to colorblind players, which is a small but real piece of accessibility work that a lot of mid-campaign boss fights skip. The fact that the same audio scaffolding can be reused on later commanders is one of the reasons this template scales.
What players actually fight with
The encounter has a clear preferred loadout, and the drop list is best read alongside it. The wiki guidance is consistent: bring weapons or ordnance that deal Incendiary or fire damage, because the vulnerable state is explicitly weak to that element. A balanced setup for a first clear usually looks like the following.
| Slot | Role during the fight | Preferred damage type | Why it matters |
|---|---|---|---|
| Primary weapon | Sustained damage on the three flesh bars | Incendiary or fire | Maximum efficiency during the vulnerable phase |
| Secondary weapon | Add control and shielded enemies | Shock or corrosive, depending on adds | Keeps the arena clear so the green rod is easy to see |
| Ordnance | Burst damage when armor is down | Incendiary grenades or rockets | Concentrates burst into the small vulnerable window |
| Movement tool | Repositioning and pulling the green rod | Grapple | Mandatory for the armor-strip interaction |
| Shield or class mod | Survivability during the rod phase | Element-agnostic, but with health or capacity roll | Buy time while waiting for the next rod cycle |
That table is also a useful sanity check for any Borderlands 4 player who feels stuck. If the squad has three corrosive guns and no Incendiary option, the fight will look far harder than it actually is, because the vulnerable state punishes the wrong element. The drops will still be there once the squad adjusts, but the time-to-clear will be much longer than the encounter design intends. A common mistake is to assume that the fight scales with overall damage output, when in practice it scales almost entirely with how quickly the squad converts the vulnerable phase into flesh-bar damage. The Incendiary focus is not a flavor choice; it is the actual difficulty dial.
Shield choice is more flexible than the weapon table implies. A high-capacity shield with a fast recharge tends to outperform a low-capacity shield with a powerful nova effect, because the player needs to survive multiple rod cycles before the kill and the shield recharge lines up cleanly with the rod phase. Class mods that boost cooldown rate also help, because the grapple is on a short timer and any delay in pulling the green rod costs the squad a full cycle of flesh-bar damage. None of this is hidden; it is just easy to overlook on a first run, when the player is still parsing the rod mechanic.
How the Encore machine reshapes idolator sol drops as a farm
Borderlands 4 uses Moxxi’s Big Encore machine near the boss entrance to let players re-fight a commander without replaying the entire mission. Idolator Sol is one of the first bosses where that machine is genuinely useful, because his drops are conditional on the armor-strip loop. A first attempt often burns the rod or kills the wrong add, and the Encore machine exists specifically so players can re-run the encounter cheaply until they understand the timing. A first clear that takes fifteen minutes can usually be turned into a four-minute Encore run by the third attempt, and that compression is the whole point of the tool.
From a production standpoint, three design choices stand out about how that machine is integrated.
- The Encore machine is placed at the entrance, so the re-fight is a pure combat restart, with no loading back through the level.
- The boss has a clearly telegraphed “wait for the rod” moment every cycle, so failed runs still teach the player something.
- The drop list is keyed to the kill flag, not to damage type, so the player is not punished for bringing the wrong element on a practice run.
Together, those choices turn idolator sol drops into a teaching tool as much as a reward. A new player learns that later commanders will probably use the same armor-strip pattern, so paying attention to the green rod pays off in farming time across the rest of the campaign. It also means that the Encore machine is not a “cheat” so much as a refund on the time the player spent learning the encounter, which is a useful framing for how re-fight tools should feel in any mid-campaign boss. A re-fight tool that costs the player a loading screen is a tax; one that costs the player only a short walk back to the arena is a real practice loop.
There is a related production point here that is worth pulling out for any studio shipping a similar mechanic. The Encore machine is most useful when the encounter has a clear binary failure state, because the player can correlate their inputs with the result on the next run. Idolator Sol is a good fit for that pattern because the armor-strip loop either works or it does not. A more forgiving encounter with soft failure states would not benefit as much from the Encore machine, because the player would not have a clear signal that they failed at all. Binary loops and re-fight tools are a natural pair, and Borderlands 4 leans into that pairing earlier in the campaign than most looter shooters do.
What kind of loot idolator sol drops are actually tuned for
Borderlands as a series is unusually honest about the difference between “good drops” and “the right drops for the next two hours.” Idolator Sol sits in the first category, not the second. The encounter is balanced to give a player one or two pieces that solve a current problem, plus a small chance of a chase item, but the encounter is not tuned to be the best farm in the game. The table below maps that to the way most players will actually use the drops.
| Player goal | What idolator sol drops typically deliver | What the drops do not replace |
|---|---|---|
| Survive the next commander fight | One Incendiary or fire-focused weapon that builds on the lesson of the encounter | Endgame dedicated drops from the late-game bosses |
| Stabilize a mid-campaign build | A class-neutral legendary that fills a missing role | Class-specific chase items from later content |
| Prepare for higher Mayhem levels | Mostly cosmetic or shard items at this stage | Late-game anointments and rolls |
| Fill out the collection log | One new entry per kill, plus a small chance of a chase drop | Full collection completion, which needs later bosses |
| Practice the armor-strip pattern | Reliable practice loot with predictable rolls | Rare drop rates tuned for endgame grinders |
The headline for any player planning their first hours is that idolator sol drops are a checkpoint reward, not a final loadout. The encounter is a tutorial disguised as a boss fight, and the loot validates the lesson rather than ending the grind. That framing also helps explain why some players come away from the fight feeling under-rewarded: they were expecting a chase item, when the encounter was actually designed to hand them a steady, build-supporting drop that the rest of the campaign can lean on. The drop is a foothold, not a finish line, and the difference matters once the player reaches the next commander and has to decide whether to farm the old fight or push the story forward.
It is also worth being honest about the loot ceiling. The chase-item rate on Idolator Sol is intentionally low, because the fight sits early enough in the campaign that a high chase rate would let players skip the gear progression that Borderlands 4 is trying to teach. Players who want the chase items will find them on later commanders, where the encounter difficulty and the drop rarity are tuned together. Idolator Sol is the easy-mode version of that trade-off, and that is part of why the fight is such a useful first reference point for the rest of the arc.
What a developer can learn from the armor-strip loop
The interesting thing about idolator sol drops from a GameDev perspective is that the loot table is downstream of a state change that the player has to discover. The boss is technically damageable from frame one, but every damage value is multiplied by zero until the locust rod is thrown back. That is a deliberate design choice, and it has several production implications.
- Tutorial states can be hidden inside reward states, which keeps the encounter from feeling like a cutscene.
- Drop tables can be tied to a single flag, which makes balance patches easier to ship because the designers only need to retune one boolean.
- Farm value is automatically self-balancing, because the player can re-run the fight through Moxxi’s Big Encore until they have what they want, and the system does not need a separate “easy mode” toggle.
- The visual language of the gate mechanic can be reused in later content, which means the player pays the tutorial cost once and reuses it across the campaign.
For a small studio building a similar mid-campaign commander, the takeaway is that an armor-strip interaction is cheaper to implement than a full damage-tuning pass, and it gives the encounter a much clearer identity. The player walks away with two memories: the green rod, and the loot. Both are useful for the next commander, and both are cheap to author because the same animation, sound, and loot table scaffolding can be reused on later bosses with a different gate object. That reuse is the real production win, because it turns a one-off mechanic into a campaign-wide grammar without doubling the art or engineering budget.
There is a useful counter-example to flag here as well. An armor-strip loop only works if the gate object is visually distinct from the surrounding projectiles, and only if the vulnerable state is genuinely weaker than the armored state. A version of this template where the green rod is a slightly different shade of red, or where the flesh bars are the same damage type as the armor, would lose the player’s trust within a few cycles. Borderlands 4 gets the contrast right, and that contrast is what carries the mechanic across the rest of the commander arc. A studio that copies the loop without the contrast work will end up with a fight that looks like the template but feels arbitrary, and arbitrary fights are the ones players stop paying attention to.
Common failure modes on a first clear
Most first clears go wrong in one of three ways, and each one is worth naming because it changes how idolator sol drops are perceived.
- Ignoring the green rod and trying to damage the bio-armor directly. The boss becomes effectively unkillable and the drop table never opens.
- Throwing the green rod back at the wrong moment. The armor does not strip, the vulnerable phase never starts, and the cycle repeats.
- Clearing adds too aggressively. The arena gets crowded, the green rod is hard to see, and the player loses track of the cycle.
Each of these failures is recoverable through the Encore machine, and that recoverability is part of the design. The encounter is hard on purpose, but the punishment for failure is limited to time, not to a lost drop or a hard reset. That balance is what makes idolator sol drops feel fair to learn. A related failure mode worth flagging is spending ordnance on the bio-armor phase: the player sees the boss take no damage, panics, and burns cooldowns before the vulnerable window ever opens, which then leaves the squad under-equipped for the actual flesh-bar burst. The fix is to treat the rod phase as a setup step, not a damage step, and to hold the grenade for the moment the armor actually drops.
A subtler failure mode is overcorrecting on the second run. After a bad first clear, players sometimes swap their entire loadout to fire damage and forget about add control, which leaves the arena full of adds by the second rod cycle. The green rod is still there, but it is harder to see and the vulnerable window gets eaten by the surrounding mobs. The fix is to keep one slot for shock or corrosive damage and let the rest of the kit stay Incendiary. That single concession is usually the difference between a clean clear and a four-minute Encore loop.
How the fight compares to other commander encounters
Borderlands 4’s commander fights share a common structure, but each one layers a different mechanic on top of the armor-strip idea. Idolator Sol is the simplest version of that pattern, which is why his drop table is also the most predictable.
| Commander fight | Gate mechanic | Damage phase | What idolator sol drops teach about it |
|---|---|---|---|
| Idolator Sol | Locust rod armor strip | Three flesh bars weak to Incendiary | Baseline interaction and reward pattern |
| Bio-Bulkhead (predecessor mini-boss) | Smaller-scale bio-armor | Short Incendiary burst | Why the rod mechanic is worth learning early |
| Later commanders (post-campaign) | Multi-stage armor strip with adds | Element-specific burst windows | Why the early reward pattern is worth farming now |
| Optional commanders (side content) | Variant armor with non-bio plating | Element-agnostic damage phase | Why the bio-armor pattern is special to the main arc |
Reading the table from left to right, the design lesson is that the locust rod mechanic is the spine of the commander arc. Players who internalize the loop on Idolator Sol are mechanically prepared for what comes next, and the drops are tuned to reward that preparation rather than to replace it. Optional side bosses break that pattern on purpose, which is part of why their loot tables feel different: the design wants the player to feel that the main arc teaches a specific grammar, and the side content is where that grammar gets bent. The contrast between the two is what makes the main arc feel like a campaign, rather than a sequence of unrelated boss fights.
It is also worth noting that the comparison runs in the other direction as well. A player who has already cleared the later commanders will probably find Idolator Sol underwhelming on a return visit, because the gate mechanic and the damage phase are both simpler than what comes after. That is fine, and arguably correct, because the encounter is designed for a first-time player who has not yet seen the pattern. A farm-focused player will outgrow the fight quickly, and that is a sign that the template is doing its job, not that the fight is broken.
How a player should plan a first run
A first clear is more about preparation than it is about execution, and a few simple choices tend to make idolator sol drops feel more rewarding.
- Bring at least one Incendiary weapon into the fight, even if it is not the player’s strongest option.
- Save the ordnance cooldown for the vulnerable phase, so the burst is concentrated on the flesh bars.
- Identify the green rod quickly. It is one of several rods in a line, but the color contrast is intentional.
- Do not chase adds across the arena. Position around the rod spawn and let the adds come to the player.
- Use the Encore machine for any practice run, so the first real attempt is on fresh cooldowns.
- Keep the grapple on a short cooldown by picking a movement tool that recharges passively.
- After the kill, check the drop on the spot before reviving cooldowns, so the player can decide whether to farm immediately.
That checklist is short on purpose. The encounter is designed to be readable once the player focuses on the armor strip, and overplanning tends to push the player away from the rod mechanic that the fight is built around. A common temptation is to bring a sniper rifle for the flesh-bar phase, but the arena is too tight for a long sightline, and a close-to-mid Incendiary weapon tends to land more pellets per cycle. A second temptation is to over-commit to the rod throw and forget the follow-up burst, which leaves the flesh bars under-damage and lengthens the cycle for the next phase.
Squad play adds two more rules that are worth naming. First, designate one player as the rod puller and let the rest of the squad handle adds, because two players reaching for the same green rod usually means one of them gets there late. Second, call the vulnerable window out loud, because the audio cue is easy to miss in a four-player lobby. Both rules are optional on a first clear, but they turn into a real time saving once the squad starts farming the encounter through the Encore machine. They are also the kind of small social rules that any Borderlands 4 group can settle on inside two or three runs, and they are exactly the kind of habit that pays off on the later commanders.
What a producer should plan for when shipping a similar fight
For a producer or lead looking at this encounter as a reference, the checklist is less about loot and more about scope.
- Define the gate mechanic first, then design the loot list around the gate, not the other way around.
- Keep the gate interaction readable from the player camera. A green rod against a brown floor is a deliberate contrast choice.
- Tie the drop table to a kill flag, so balance changes do not require re-authoring the encounter.
- Place a re-fight tool near the boss, so QA and players can iterate on the same encounter cheaply.
- Tune the reward to validate the lesson, not to skip the next four hours of content.
- Reuse the gate object’s animation and audio scaffolding on later commanders, so the player’s tutorial investment pays off.
Those are not expensive changes, but they change how a fight feels. Idolator sol drops work because the design has each of those points, and a similar commander without them tends to feel either too easy or unrewarded. The cheaper the gate mechanic is to author, the easier it is to ship a whole arc of commanders that share the same grammar, which is part of why the Borderlands 4 commander arc feels coherent from the first fight to the last. Producers who try to ship a similar arc without that coherence usually end up with one good commander and four forgettable ones, and the player notices the drop-off within a single session.
There is a budget point worth pulling out as well. The same gate object, the same vulnerable-state animation, and the same drop-flag plumbing can be reused on every commander in the arc, which means each new boss is mostly art and arena rather than a fresh mechanic. That is the kind of reuse that turns a five-commander arc into the budget of three, and it is only possible because the first fight was scoped tightly enough to be reusable. Idolator Sol is the cheapest commander in the arc, and that cheapness is the feature.
What the encounter signals about the wider game
The single most useful thing about Idolator Sol as a reference point is that the entire commander arc can be read from one fight. The armor-strip loop, the Incendiary weakness, the Encore machine, the predictable drop table, and the chase-item ceiling all repeat in later content. A player who understands the loop on Idolator Sol is mechanically prepared for what the rest of the campaign asks of them, and a developer who understands why the loop works has a clean template for the rest of the commander encounters. That readability is a deliberate design goal, and it is the reason the fight gets a wiki page of its own rather than being folded into a general boss guide.
For the wider Borderlands 4 economy, the encounter also sets a price for the player’s time. Each kill through the Encore machine is a known cost in minutes, and the drop table is a known return in items. That is the same trade-off a player makes on every later commander, and Idolator Sol is the first time the player gets to feel the trade-off in practice. Once that pattern is internalised, the rest of the campaign is just a series of increasingly expensive versions of the same loop, with better loot attached. That framing is also why the drop ceiling on Idolator Sol is intentionally low: the economy only works if the player is willing to push the story forward, and a high chase rate on the first commander would undermine that willingness.
That is the real reason idolator sol drops matter at this stage of the game. The loot is good enough to feel rewarding, the encounter is small enough to learn, and the design is honest enough to teach the player how the rest of the campaign will probably behave. Anyone planning a Borderlands 4 playthrough can treat the fight as a benchmark: if the loop feels intuitive on Idolator Sol, the rest of the commander arc will probably feel intuitive too. A player who bounces off the green rod mechanic on the first try will probably bounce off the later commanders as well, which is a useful early signal that the build, the squad, or the loadout needs a small adjustment before the harder fights start to pile up.
It is also worth being honest about what idolator sol drops do not signal. The encounter is a poor predictor of late-game loot tables, because those tables are tuned around build-specific chase items that the mid-campaign does not have access to. A player who farms Idolator Sol expecting a late-game feel will be disappointed, and that disappointment is the cost of misreading the encounter’s role in the wider economy. The fight is a checkpoint, not a destination, and treating it as anything else will cost the player time that would have been better spent pushing the story forward and unlocking the commanders that the drop table was actually designed around.
Frequently asked questions
Who is Idolator Sol in Borderlands 4?
Idolator Sol is the second major boss of the campaign and the first of the Timekeeper’s commanders met on Kairos. He is encountered at the end of the Rush the Gate mission, inside Fortress Indomita in the Idolator’s Noose region of The Fadefields.
Where do players fight Idolator Sol?
He is found at the end of Fortress Indomita, in the Idolator’s Noose area of The Fadefields. Players drop down a hole in the floor between the two vending machines at the northern end of the fortress to start the encounter.
Why does Idolator Sol take no damage at the start of the fight?
He is covered in bio-armor that absorbs damage. The armor has to be stripped with the locust bio-weapon before the flesh health bars underneath can be damaged. The strip happens when the player throws a green locust rod back at him after one of his attacks.
How does the locust rod mechanic actually work?
Idolator Sol fires a line of red rods plus one green rod that stick into the ground. The player uses the grapple to pull the green rod out and throws it back at him. The rod removes the bio-armor and exposes the vulnerable health bars.
Which damage type is best against Idolator Sol?
Incendiary and fire damage are the most effective element against the vulnerable state. Bringing at least one Incendiary weapon and a fire-focused ordnance is the recommended loadout for a clean clear.
Can players farm Idolator Sol after the first kill?
Yes. Moxxi’s Big Encore machine is placed near the boss entrance, so players can re-fight him without replaying Rush the Gate. That makes idolator sol drops practical to farm without a long mission reset.
What kind of loot does Idolator Sol drop?
He drops Legendary weapons and items, with the specific list documented on the Borderlands 4 wiki. The drops are tuned to validate the armor-strip lesson and to support a build for the next commander fight, rather than to replace endgame chase items.
Are Idolator Sol’s drops worth farming early in the campaign?
They are worth one or two practice runs because they teach the armor-strip pattern that later commanders use. For a pure chase-item grind, the later commanders are usually more efficient, so the encounter is best treated as a tutorial farm rather than a long-term target.
What is the most common mistake on a first clear?
The most common mistake is ignoring the green rod and trying to brute-force the bio-armor. The armor absorbs damage, so the fight stalls and the drop table never opens. The fix is to wait for the rod attack, pull the green rod, and throw it back at him before committing ordnance.
What should a developer learn from the Idolator Sol encounter?
The encounter shows that a small gate mechanic, a clearly readable projectile, and a drop table tied to a kill flag are enough to make a mid-campaign commander feel intentional. The armor-strip loop is the spine of the wider commander arc, and a similar template can be reused for later fights with more layers and additional adds.





Leave a Reply